
Kitchen floor cleaning involves a multi-step process to address various stains caused by everyday activities. Preparation is key, including gathering supplies like mild dish soap, warm water, and a soft-bristled brush. Safety measures should be taken, such as wearing gloves. Initial cleaning starts with removing debris, followed by targeted stain removal techniques based on the type of stain (grease, coffee, wine). Using non-acidic cleaners is recommended for tile preservation. Regular maintenance includes daily sweeping, mild pH-neutral cleaners, prompt spot cleaning, and occasional deep cleaning to prevent future staining. Avoiding harsh chemicals and excessive water exposure protects tiles from damage.
Tired of dealing with unsightly kitchen tile stains? This comprehensive guide dives into the world of kitchen floor cleaning, offering expert insights on understanding and removing various types of stains. From identifying common causes to mastering pre-cleaning techniques, we equip you with the knowledge needed for successful stain removal. Learn about effective cleaners, follow our step-by-step process, and discover solutions tailored to specific challenges like oil, wine, and urine. Protect your tiles with aftercare tips and maintain their luster through regular maintenance.
Understanding Kitchen Tile Stains: Common Causes and Types

Kitchen tile stains can be a common concern for many homeowners, but understanding their causes and types is the first step in effective kitchen floor cleaning. Stains on kitchen tiles often result from everyday activities like spills, dropped food items, or even pet accidents. Over time, these can lead to discolouration, especially in areas with high foot traffic or frequent exposure to moisture.
There are several types of stains that can appear on kitchen tiles, including water stains caused by leaks or excessive humidity, oil and grease buildup from cooking, and dark marks left by acidic substances like lemon juice or coffee. Additionally, tile grout, the material between tiles, is also prone to staining. Regular cleaning routines and prompt stain removal are essential practices in maintaining a clean and pristine kitchen floor.
Preparation: Cleaning Supplies and Safety Measures

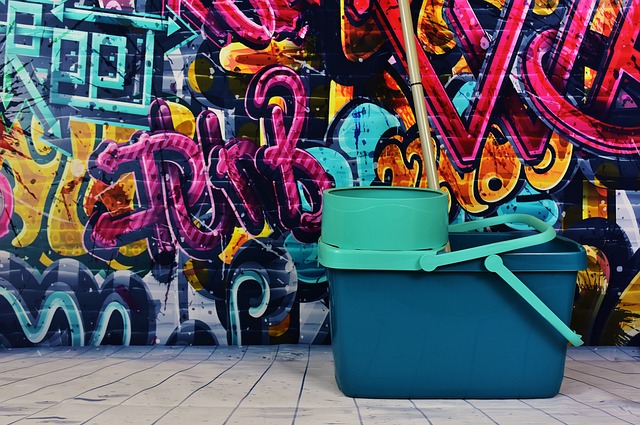
Before tackling any stain removal task, proper preparation is key. For kitchen floor cleaning, gather essential cleaning supplies such as mild dish soap, warm water, a soft-bristled brush or sponge, and a vacuum cleaner with a suction nozzle. Safety measures include wearing protective gloves to prevent skin irritation from chemicals, and ensuring adequate ventilation to avoid inhaling harsh fumes.
Additionally, identify the type of stain you’re dealing with – whether it’s from grease, coffee, or wine – as different stains may require specific cleaning agents. Test any cleaning solution on a small, inconspicuous area first to ensure it doesn’t damage or discolour the tiles. This cautious approach will help ensure your kitchen floor cleaning process is effective and safe.
Softening Stubborn Stains: Effective Pre-Cleaning Techniques

Removing stubborn kitchen tile stains requires a strategic approach, starting with effective pre-cleaning techniques. Before diving into any cleaning solution, it’s crucial to soften and loosen the stain. Begin by spraying a mixture of warm water and mild dish soap directly onto the stained area. Let it soak for several minutes, allowing the soapy water to penetrate and break down the stain. This initial step often makes the difference between a tough-to-remove mark and one that comes right off.
Use a soft-bristled brush or sponge to gently scrub the stained spot. Avoid using harsh scrapers or abrasive materials that could damage the tile surface. If the stain persists, try pre-treating it with a commercial stain remover designed for kitchen floor cleaning. Follow the product instructions carefully, allowing adequate time for the treatment to work before proceeding to a thorough rinsing and drying process.
Choosing the Right Cleaner: Acidic vs. Non-Acidic Solutions

When it comes to kitchen floor cleaning, choosing the right cleaner is half the battle won. One crucial consideration is whether to opt for an acidic or non-acidic solution for stain removal. Acidic cleaners are highly effective at tackling stubborn stains and grease buildup, common issues in kitchens due to the high moisture and heat levels. They can dissolve mineral deposits and break down organic matter, making them ideal for deep cleaning. However, their strong nature means they can be harsh on certain types of tiles and may cause damage if not used properly.
Non-acidic solutions, on the other hand, are gentler alternatives suitable for a wide range of tile materials. These cleaners are often based on enzymes or plant extracts, which effectively break down grease and grime without corroding tile surfaces. While they might not be as potent as acidic options, non-acidic cleaners are safe for daily use and won’t leave behind harsh residues. For kitchen floor cleaning, especially in homes with various types of tiles, a non-acidic approach is often recommended to ensure long-lasting protection and maintain the aesthetics of the space.
Step-by-Step Guide to Cleaning Kitchen Floor Tiles
Removing stains from kitchen floor tiles is a straightforward process that can instantly refresh your space. Here’s a step-by-step guide to ensure spotless results. Start by sweeping or vacuuming the floor to eliminate any loose debris. Next, identify the type of stain—whether it’s grease, food, or water damage—as this will determine your cleaning approach. For grease stains, apply a mild detergent and warm water solution, using a soft-bristled brush for gentle scrubbing. Food stains often respond well to a mixture of baking soda and vinegar, creating a natural cleaning agent that cuts through grime.
For water-based stains or general kitchen floor cleaning, a simple mix of equal parts water and white vinegar is effective. This solution is safe for most tile types and effectively breaks down dirt and grime without harsh chemicals. After scrubbing, rinse the floor thoroughly with clean water and dry it promptly to prevent water spots. Regular kitchen floor cleaning using these methods will keep your tiles looking their best and extend their lifespan.
Dealing with Specific Stains: Oil, Wine, Urine, and More
When it comes to kitchen floor cleaning, tackling specific stains requires tailored approaches. Oil and wine stains, for instance, demand immediate action. Blotting the excess liquid is the first step, followed by using a mild detergent or specialized cleaner designed for kitchen tile. For tough oil-based stains, try a mixture of baking soda and vinegar; this natural cleaning solution helps break down the grease without damaging your tiles.
Urine stains on kitchen floors can be particularly persistent. Start by blotting as much liquid as possible with paper towels. Then, apply a mild floor cleaner or a solution of warm water and white vinegar to neutralize the ammonia in urine. For stubborn cases, consider using an enzymatic cleaner, which breaks down organic compounds effectively. Regular cleaning and prompt stain removal are key to maintaining a clean kitchen floor.
Aftercare: Protecting Your Tiles from Future Staining

Once you’ve successfully removed stubborn kitchen tile stains, it’s crucial to implement proper aftercare practices to protect your tiles from future staining. Regular kitchen floor cleaning is essential; use a mild detergent and warm water to avoid damaging the tiles or grout. Mopping frequently can prevent dust and grime buildup, which are primary causes of staining.
Consider applying a protective sealer to your kitchen floor. This step creates a barrier between the tiles and stains, making cleanup easier and prolonging the life of your tiled surface. Regularly inspect your kitchen floor for any signs of wear or discoloration, addressing issues promptly to maintain the cleanliness and aesthetics of your kitchen.
Tips for Regular Maintenance and Keeping Tiles Looking New

Regular maintenance is key to keeping kitchen tiles looking their best and preventing stains from setting in. Start by sweeping or vacuuming your kitchen floor daily to remove loose debris, crumbs, and spills promptly. This simple step can make a significant difference in maintaining the cleanliness and longevity of your tiles.
Additionally, create a regular cleaning routine using mild, pH-neutral cleaners suitable for ceramic or porcelain tiles. Avoid harsh chemicals that could damage the tile finish or grout lines. For spot treatment, address stains immediately with a damp mop and warm water. For more stubborn marks, use a mild detergent, gently scrub with an old toothbrush, and rinse thoroughly. Regular deep cleaning will ensure your kitchen floor remains stain-free and vibrant, extending its life and keeping your space looking fresh and inviting.
Common Mistakes to Avoid During the Cleaning Process

When it comes to kitchen floor cleaning, avoiding common mistakes is key to achieving optimal stain removal and maintaining the longevity of your tiles. One of the biggest blunders is using the wrong cleaning products; always opt for a mild, pH-neutral detergent designed specifically for tile and grout cleaning. Aqueous solutions are generally safer than harsh chemicals as they won’t strip away the protective coatings or damage the tile’s finish.
Another mistake to steer clear of is excessive water usage. While some stains may require a good soak, overwatering can lead to mold and mildew growth, especially in darker tiles or areas with poor ventilation. Be mindful of the drying time between cleaning sessions and avoid prolonged submersion by using a soft-bristled brush or cloth to gently scrub away stains rather than powerful hoses or power washers that could cause damage.