
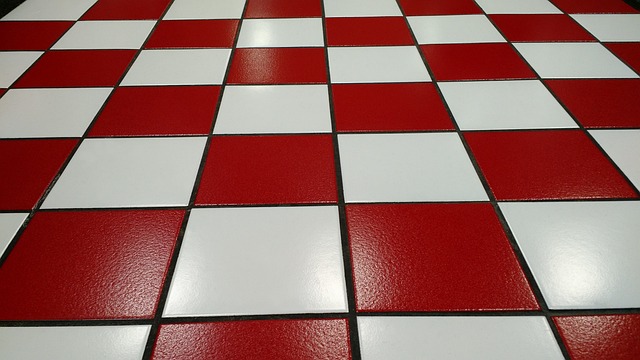
Grout stain removal is a common home task requiring understanding of stain types, suitable cleaning methods, and natural alternatives. Using baking soda, vinegar, and warm water creates an effective scrub. Preparation includes sweeping, vacuuming, and using mild detergent to clean grout lines thoroughly before applying eco-friendly, non-toxic stain removers. Testing on hidden areas is crucial. Apply the remover liberally, scrub gently, then rinse with warm water. Double-rinse with detergent and allow area to dry completely. Regular cleaning, sealing, and quick spill cleanup prevent future stains.
Looking to revive your tiled spaces? Discover the secrets to achieving affordable grout stain removal with our comprehensive guide. Understanding common causes of grout stains is the first step, followed by gathering the right tools and materials. Learn how to prepare your grout surfaces and select suitable cleaning agents for optimal results. We’ll walk you through every step, from testing on small areas to proper rinsing and drying, ensuring a streak-free, like-new finish. Plus, find preventative measures to keep stains at bay in the future.
Understanding Grout Stain Causes
Understanding Grout Stain Causes
Grout stain removal is a common home maintenance task, largely due to the high visibility of grout lines in tiled spaces. Stains can emerge from various sources—from everyday spills and splashes to more persistent residues like soap, mold, and mildew. The porous nature of grout makes it susceptible to absorbing these substances, leading to unsightly discoloration over time. Regular cleaning practices, while effective for surface stains, often fail to penetrate deep enough to address the root cause.
Identifying the specific type of stain is crucial for choosing the right grout stain removal method. For instance, mineral deposits and hard water stains typically require acid-based cleaners, while organic stains like mold and mildew demand targeted antimicrobial solutions. Avoiding harsh chemicals and understanding natural cleaning alternatives can not only make the grout stain removal process more cost-effective but also safer for your home environment.
Gathering Materials for Stain Removal

Removing grout stains doesn’t require a fancy lab or expensive tools—a few simple household items will do the trick. To get started, gather your supplies: baking soda, vinegar, and a sponge or brush are your primary weapons. Baking soda’s abrasive properties help scrub away dirt and grime while vinegar’s acidity can break down and dissolve grout stains. You might also need warm water to create a paste-like mixture for more stubborn stains. With these materials in hand, you’re ready to tackle those unsightly grout marks head-on.
Preparing Your Grout Surfaces
Before tackling any grout stain removal project, preparing your grout surfaces is a crucial step. Start by sweeping or vacuuming the area to remove any loose debris or dirt. Next, use a mild detergent and warm water to clean the grout lines thoroughly. This initial cleaning helps to loosen and dislodge stubborn stains, making them easier to eliminate.
Once the grout is clean, dry it completely using a soft cloth or towel. Moisture can react with certain stain removers, potentially causing discoloration or damage, so ensuring the surface is bone-dry is essential. Proper preparation increases the effectiveness of your chosen grout stain removal method and guarantees better results.
Choosing the Right Cleaning Agents

When it comes to grout stain removal, selecting the appropriate cleaning agents is a pivotal first step. The key lies in understanding your grout material and the type of stains you’re dealing with. For instance, ceramic or porcelain grout may require a milder cleaner to prevent damaging its finish, whereas stone grout can withstand stronger solutions. Always opt for eco-friendly, non-toxic cleaners to ensure safety and maintain a healthy living environment.
Product labels offer valuable insights into their effectiveness against various stains. Look for agents designed specifically for grout stain removal, as these are likely to include powerful yet safe ingredients. Avoid using harsh chemicals or household cleaners without proper testing, as they can etch the grout or cause discoloration. With the right cleaning agent in hand, you’re well-equipped to tackle even the toughest grout stains effectively and affordably.
Testing on Small Areas Before Application

Before applying any grout stain removal solutions, it’s crucial to test them on a small, hidden area of your grout first. This prevents accidental damage or discoloration across larger surfaces. Start by cleaning the grout thoroughly and then apply a small amount of the chosen stain remover in an inconspicuous spot. Wait for the recommended time as per the product instructions, then check for any adverse reactions or changes in color. If everything looks good, you can proceed with confidence, knowing your chosen method is effective and safe for your grout. Otherwise, consider switching to an alternative or consulting a professional for guidance.
Testing ensures that you avoid costly mistakes and potentially damaging your grout’s appearance. It’s an essential step in the grout stain removal process, allowing you to customize your approach based on your specific grout type and stain severity. Remember, when it comes to grout stain removal, affordable doesn’t always mean effective—so take the time to ensure the right fit for your space.
Applying the Stain Remover Effectively

When it comes to effective grout stain removal, proper application is key. Begin by sweeping or vacuuming the floor to eliminate any loose dirt or debris. This step ensures that your cleaner penetrates deeply into the grout lines without obstruction. Next, mix your chosen grout stain remover according to the manufacturer’s instructions, ensuring a smooth consistency for even distribution. Apply the solution liberally to the stained areas using a sponge or brush, allowing it to saturate the grout. For best results, work in small sections, applying pressure as you scrub gently but firmly to lift stains. Rinse thoroughly with warm water after a few minutes, observing as the stain dissipates before your eyes.
Rinsing and Drying Properly

After applying your chosen grout stain removal solution, it’s crucial to thoroughly rinse the area. This step eliminates any residual chemicals and prevents further staining. Use warm water and a gentle detergent, then use a soft-bristled brush to scrub away any remaining grime. Rinse again until the water runs clear, ensuring all soap is removed.
Once rinsed, allow the grout and surrounding tiles to dry completely. Proper drying is essential to prevent moisture-related issues like mold or mildew growth. Speed up the process with a clean towel or leave it to air dry, but make sure it’s entirely dry before reassembling any furniture or using the area again. This simple step can significantly enhance your grout stain removal results and maintain the longevity of your tile work.
Preventative Measures for Future Stains

Regular cleaning and sealing are key preventive measures for future grout stain removal. Sweep or vacuum your floors daily to eliminate dirt and debris that can lead to staining. Additionally, use a grout sealers every 6-12 months to create a protective barrier between the grout lines and stains. These sealants fill in pores, making it difficult for liquids and other substances to penetrate the grout.
Wiping up spills promptly is another effective strategy. The longer a stain has to set, the harder it will be to remove. Consider keeping a microfiber cloth or sponge nearby to quickly blot at spills before they have a chance to soak into the grout. Regularly deep clean your floors with a mild detergent and warm water to maintain their appearance and prevent future stains from taking hold.