
Homeowners dealing with grout line stains should act swiftly to prevent damage. Pre-treat stained areas with a mild detergent, then apply an appropriate cleaning agent based on stain type. Targeted application techniques using small tools are key. Scrub gently, rinse thoroughly, and dry completely for effective stain removal. Regular sealing protects against future stains. Avoid harsh chemicals and correct identification of stain types for best results. Consistent cleaning maintains grout lines' integrity.
Grout line stains can be a nuisance, but with the right approach, they’re manageable. This comprehensive guide delves into effective stain removal techniques for your grout lines, addressing various causes and types of stains. From pre-treatment preparation to choosing the best cleaning agents, application methods, and final sealing, we provide step-by-step instructions to help you remove stains promptly. Learn common mistakes to avoid and long-term maintenance tips to keep your grout lines spotless.
Understanding Grout Line Stains: Causes and Types
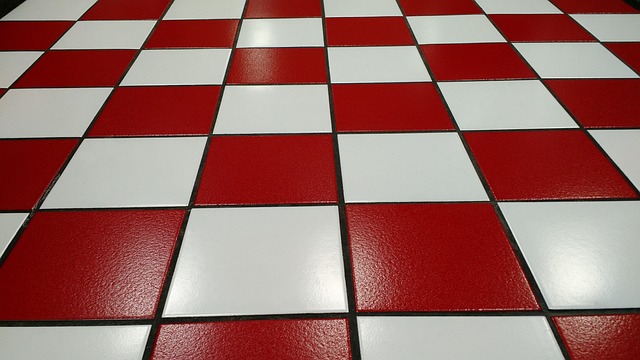
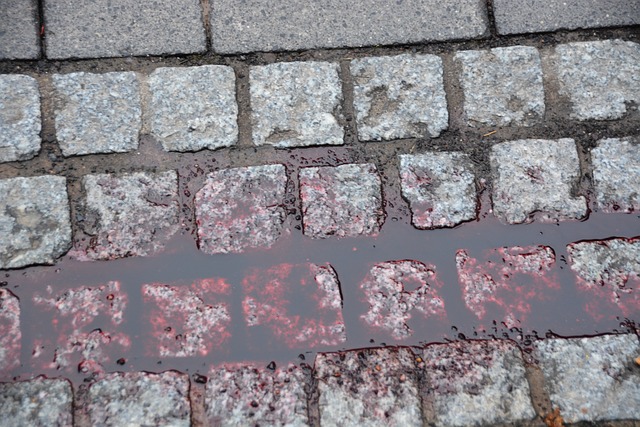
Grout line stains can be a common and frustrating issue for homeowners, especially those with tiled surfaces. Understanding the causes and types of these stains is the first step in effectively removing them. Grout lines, by nature, are prone to staining due to their porous material and constant exposure to moisture and various substances.
Causes range from everyday spills and drops to more persistent issues like mold growth and mildew. Types of stains include water spots, which appear as light-colored patches, and oil-based stains from grease or grime that leave darker, more discolored lines. Remove Stains from Grout Lines involves identifying the specific type of stain for the most suitable cleaning method.
Pre-Treatment: Preparing the Surface for Cleaning

Before tackling any stain removal task, proper preparation is key. When it comes to removing stains from grout lines, pre-treatment involves a few essential steps. Begin by sweeping or vacuuming the floor to eliminate any loose debris or dirt that might interfere with the cleaning process. Next, use a soft-bristled brush or an old toothbrush to gently scrub away any visible surface stains on the grout. This initial step helps in exposing the deeper layers and ensures more effective cleaning.
Additionally, apply a small amount of mild detergent or grout cleaner directly onto the stained areas. Let it sit for several minutes to allow the solution to penetrate the grout lines. This pre-treatment not only softens the stain but also assists in breaking down any grease, dirt, or mineral deposits that have accumulated over time. Rinse thoroughly with warm water to wash away the detergent and any loosened debris, leaving your grout lines ready for a more intensive cleaning process.
Choosing the Right Cleaning Agents: What Works Best?

When it comes to removing stains from grout lines, choosing the right cleaning agents is paramount. Different types of stains require specific solutions, so understanding your options is key. For general staining, a mixture of warm water and mild detergent or a commercial grout cleaner is often effective. These gentle yet powerful cleaners can dissolve oils, grease, and most organic stains without damaging the grout material.
For tougher stains, like those caused by rust, mold, or calcium deposits, more aggressive methods may be needed. Bleach-based products can be used for white grout to whiten and brighten, but they must be applied with caution to avoid discoloration. For deeper cleaning, acidic solutions like vinegar or lemon juice can help break down stubborn stains. Always test any cleaning agent in a small, hidden area first to ensure compatibility with your grout’s finish.
Application Techniques: Getting the Solution into the Lines
When it comes to removing stains from grout lines, understanding different application techniques is key. One effective method involves using a small brush or applicator to directly apply the stain remover to the affected areas. This targeted approach ensures the solution gets deep into the grout lines, where dirt and grime often hide. By gently scrubbing the cleaner into the pores of the grout, you enhance its ability to dislodge stubborn stains.
For best results, consider using a grout line brush designed for such tasks. These tools are typically small, fine-bristled brushes that can reach tight spaces. Alternatively, a cotton swab or toothpick can be used for more precise applications. After applying the cleaner, let it sit for a few minutes to allow penetration before wiping away any residual stains or residue with a damp cloth.
Scrubbing and Rinsing: Effective Methods for Stain Removal
Scrubbing and rinsing are fundamental techniques for removing stains from grout lines, ensuring your tiles maintain a pristine appearance. Begin by applying a non-abrasive grout cleaner to the stained area, allowing it to saturate for several minutes. This step helps loosen any built-up dirt or grime. Next, employ a stiff-bristled brush or an old toothbrush to gently scrub the stained grout lines in a back-and-forth motion. This aggressive yet targeted approach effectively dislodges stubborn stains without damaging the grout.
Rinsing is equally crucial. Thoroughly flush the area with warm water to eliminate any residue from the cleaning agent and the dirt it has displaced. Ensure no cleaner remains, as it could leave behind streaks or negatively impact future stain removal efforts. For particularly tenacious stains, repeat the scrubbing and rinsing process until the grout lines are free from discoloration. Regular upkeep and prompt attention to staining are key to maintaining a clean and aesthetically pleasing tile and grout surface.
Drying and Sealing: Final Steps to Prevent Future Stains

After successfully removing existing grout line stains, the next crucial step is drying and sealing the area to prevent future staining. Properly dried grout lines are less prone to attracting dirt, dust, and other debris that can lead to new stains. Begin by thoroughly cleaning the grout with a mild detergent or grout cleaner to eliminate any residual grime from the stain removal process. Once clean, allow the grout to air dry completely; this may take several hours or even a day, depending on humidity levels and the size of the area.
Sealing the grout lines is an essential final step. Apply a high-quality grout sealer using a brush or sprayer, ensuring complete coverage. This protective layer fills in tiny pores and gaps in the grout, preventing liquids from penetrating and causing new stains. Regularly sealed grout lines will remain cleaner for longer periods, saving you time and effort in future stain removal.
Common Mistakes to Avoid During the Cleaning Process

When tackling grout line stain removal, it’s essential to be aware of common mistakes that can hinder your cleaning efforts. One of the most frequent errors is using abrasive scrubbers or harsh chemicals straight away. Grout lines are delicate, and aggressive cleaning methods can damage the surface or even etch into the grout, making stains worse. Always opt for a soft-bristled brush or sponge to gently lift stains without causing further harm.
Another mistake to avoid is neglecting to identify the type of stain before choosing a cleaning method. Different stains require specific treatments. For instance, oil-based stains need a solvent, while mineral deposits respond better to acid-based cleaners. Using the incorrect product can lead to poor results or even damage to your grout and tile. Take the time to understand the nature of the stain for effective removal without causing unnecessary wear and tear.
Maintenance Tips: Keeping Grout Lines Spotless Long-Term

Regular maintenance is key to keeping grout lines spotless long-term. Start by sweeping or vacuuming your tiled surfaces frequently to remove loose dirt and debris that can lead to staining. Additionally, use a soft-bristled brush and mild detergent to gently scrub grout lines weekly to prevent the buildup of grime.
For more stubborn stains, apply a mixture of baking soda and water directly onto the affected area. Let it sit for several minutes before scrubbing with an old toothbrush or grout brush. Rinse thoroughly with warm water and dry completely. Regular cleaning and prompt stain removal will help maintain the integrity of your grout lines, ensuring they stay fresh and vibrant for years to come.