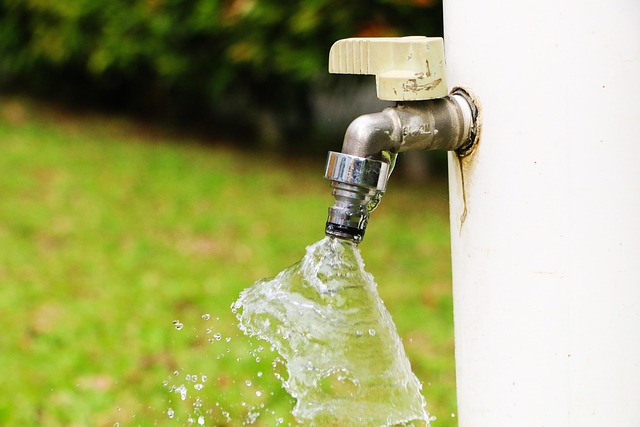
Understanding your faucet's components—handle, valve stem, cartridge, and spout—is key for effective repair. Common issues like leaks (often caused by worn O-rings or washers) can be easily resolved with the right tools and knowledge. Regular maintenance, including inspections, cleaning, and lubrication, prevents future problems. This DIY guide emphasizes the importance of faucet repair for water conservation, cost savings, and prolonging fixture lifespan.
Need to fix that leaky faucet? This comprehensive guide walks you through everything from understanding your faucet’s components to replacing worn-out washers and O-rings. Learn the common issues—like leaks, dripping, and low water pressure—and equip yourself with the tools and materials needed for a successful repair. By following our step-by-step instructions, you’ll not only save money but also gain valuable skills in faucet repair.
Understanding Your Faucet's Components

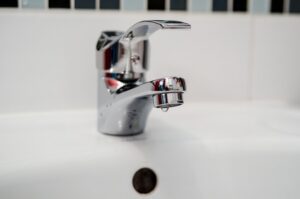
When it comes to faucet repair, understanding your faucet’s components is key. A typical faucet consists of several parts, each playing a crucial role in its functionality. The main components include the handle, valve stem, cartridge (or washer), and spout. The handle controls the flow of water by manipulating the valve stem, which in turn opens or closes the water supply to the spout. Cartridges are responsible for controlling the temperature and pressure of the water, while washers ensure a seal between moving parts to prevent leaks.
By familiarizing yourself with these parts, you’ll be better equipped to identify the source of any issues during faucet repair. This knowledge allows you to replace faulty components quickly and efficiently, whether it’s a leaking washer or a stuck valve stem. With a bit of patience and the right tools, common faucet problems can often be resolved without calling a professional plumber, saving you time and money in the process.
Identifying Common Faucet Valve Issues
When it comes to faucet repair, identifying common issues is the first step towards effective troubleshooting. One of the most frequent problems is a leaky faucet, caused by worn-out O-rings or washers inside the valve. These parts can degrade over time due to mineral buildup and normal wear and tear, leading to water leaks at the base or handle of the faucet. Another typical issue is a reduced water flow, which could be an indication of a clogged aerator or a faulty cartridge that regulates water pressure.
Additionally, some faucets may exhibit intermittent or totally absent water flow, often due to mineral deposits building up inside the valve or a damaged temperature control mechanism. Identifying these issues early can help homeowners save money on potential water damage and extend the life of their fixtures. Understanding the specific problem is crucial for effective faucet repair, ensuring that the right parts are replaced without unnecessary expense.
Tools and Materials Required for Repair
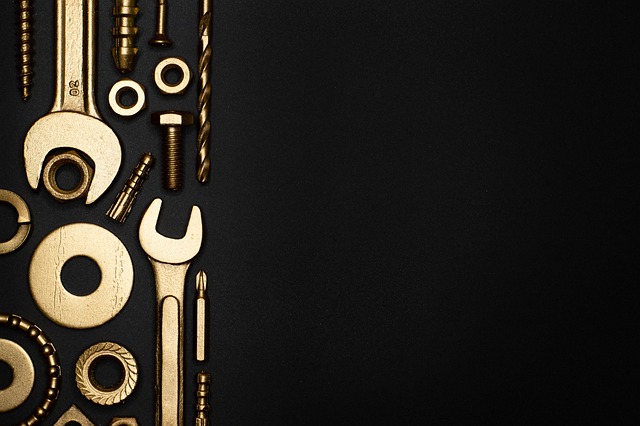
When tackling a faucet repair, having the right tools and materials is essential for a successful outcome. For most standard faucet valve repairs, you’ll need a few basic tools including adjustable wrenches (both open-end and pipe), pliers, a screwdriver (often a flathead or Phillips), and a new faucet valve cartridge (if replacing a faulty part). These tools will enable you to access, disassemble, and reassemble the internal components of your faucet. Additionally, don’t forget to gather materials such as plumber’s tape or thread sealant to ensure a secure and leak-free connection after your repairs. Having these essentials on hand allows for a smooth and efficient faucet repair process, making it an invaluable skill for any homeowner.
Step-by-Step Guide to Fixing a Leaking Faucet
Leaky faucets can be a common household issue, but fixing them is often straightforward and cost-effective. Here’s a step-by-step guide to help you tackle this problem efficiently. First, locate the faucet’s components – typically consisting of a handle, valve stem, washer, and O-ring. Then, turn off the water supply by closing the shut-off valves under the sink. This prevents water from flowing while you work. Next, remove the handle and any decorative covers to access the valve stem.
Gently wiggle or twist the valve stem to free it from its seat. Once separated, inspect for damage or wear. Replace the washer and O-ring if they appear frayed or damaged. Ensure proper alignment of these parts before reassembling. Reattach the handle and test the faucet by turning on the water supply. Look for any leaks at the connections, and tighten as needed. If the leak persists, consult a professional plumber for further assistance.
Replacing Worn-Out Washers and O-Rings
When it comes to faucet repair, one common issue that homeowners often encounter is leaking or drippy faucets caused by worn-out washers and O-rings. These components are essential parts of your faucet’s internal mechanism, responsible for controlling water flow and ensuring a tight seal. Over time, due to normal wear and tear, these parts can degrade, leading to leaks from the base or spout of your faucet.
To address this issue, replacing the washers and O-rings is a straightforward process that many DIY enthusiasts can tackle. This simple repair can save you from excessive water waste and potentially costly repairs. All you’ll need are some replacement parts, which typically include new washers and O-rings compatible with your faucet model, along with basic tools like pliers or a wrench. By following a few simple steps, you can effectively stop the leaks, restore your faucet’s functionality, and contribute to water conservation in your home, making it an essential part of any faucet repair regimen.
Troubleshooting Dripping Faucets
Dripping faucets can be a common household issue, but it’s a problem that can easily be addressed with some basic DIY skills and the right tools. Before diving into more complex repairs, troubleshooting is a crucial step to identify the root cause of the drip. Start by inspecting the faucet for any visible damage or loose parts. Check the O-rings and washers, as these are common sources of leaks. Over time, these components can wear out, allowing water to escape. A simple replacement might be all that’s needed to stop the drip.
If the leak persists, consider the faucet’s internal mechanisms. Different types of valves and cartridges may require specific repair techniques. For instance, some faucets have adjustable flow controls that, if misaligned, can cause dripping. Calibrating these settings or replacing the cartridge could fix the issue. If you’re unsure about any part of the troubleshooting process, consult a professional plumber for guidance on faucet repair to ensure the problem is resolved effectively.
Tips for Maintaining Your Faucet Valves
Regular maintenance is key to preventing faucet repair issues. Start by checking your valves periodically for any signs of leaks, corrosion, or damage. A simple visual inspection can help you catch problems early on, saving you time and money in the long run.
Consider using a mixture of white vinegar and water to clean the valves. This natural solution is effective in removing mineral deposits and rust without causing harm to the parts. Additionally, lubricating the valves with a lightweight oil, such as silicone grease, can help ensure smooth operation and prevent stiffening over time.