
This text provides a comprehensive guide to repairing concrete driveway cracks, emphasizing the importance of identifying crack types (vertical, horizontal, diagonal) and evaluating damage severity. It recommends using specific repair compounds like epoxy or polyurethane for effective filling, while highlighting the necessity of proper tools, cleaning, and preparation. The guide stresses prompt attention to small cracks to prevent structural issues and offers tips on avoiding common mistakes. Regular maintenance through drainage management and annual sealing is promoted to extend driveway life and minimize crack repair needs, with a focus on long-lasting solutions.
“Concrete driveway cracks can range from minor aesthetics to structural concerns. Understanding their causes, whether weather-related, settlement, or tree roots, is key to effective crack repair. This guide delves into the process, from identifying crack types and prioritizing repairs based on severity to choosing the right materials and tools. We’ll walk you through a step-by-step approach, highlighting common mistakes to avoid, and offer maintenance tips to prevent future cracks, ensuring your concrete driveway’s longevity.”
Understanding Concrete Driveway Cracks: Causes and Types
Concrete driveway cracks can range from small, hairline fissures to large, wide-spread splits, each with its own cause and type. Understanding these variations is crucial for effective crack repair. The most common causes include movement due to temperature changes, settling of the concrete, tree roots pushing against the surface, and traffic or weight load damage. These factors can lead to several types of cracks: vertical cracks that run straight up and down, horizontal cracks that span across the driveway’s width, diagonal cracks forming an “X,” and random, irregular cracks caused by underlying soil movement.
Identifying the specific type of crack is key to choosing the right repair method. For narrow vertical or diagonal cracks, a basic epoxy injection or concrete patching compound may suffice. Wider cracks or those caused by structural issues might require more intensive methods like mudjacking, where jackhammers are used to lift and adjust misaligned concrete sections, followed by a new layer of concrete for a durable fix.
Evaluating the Scope of Damage: Crack Repair Prioritization

Evaluating the scope of damage is the first step in crack repair prioritization for your concrete driveway. Start by visually inspecting the entire driveway to identify the type, severity, and extent of cracks. Minor cracks less than 1/4-inch wide and not spreading outwards may only require filling with a crack sealer. Wider or diagonal cracks, especially those showing signs of structural instability or extending into the foundation, necessitate more extensive repair methods like patching, overlaying, or even complete replacement.
Prioritize crack repair based on both cosmetic and structural considerations. While small cracks might not immediately compromise the integrity of your driveway, addressing them promptly helps maintain its aesthetic appeal and prevents further damage down the line. Larger, more severe cracks pose a greater risk to the structure and should be addressed as soon as possible to ensure safety and prevent costly repairs in the future.
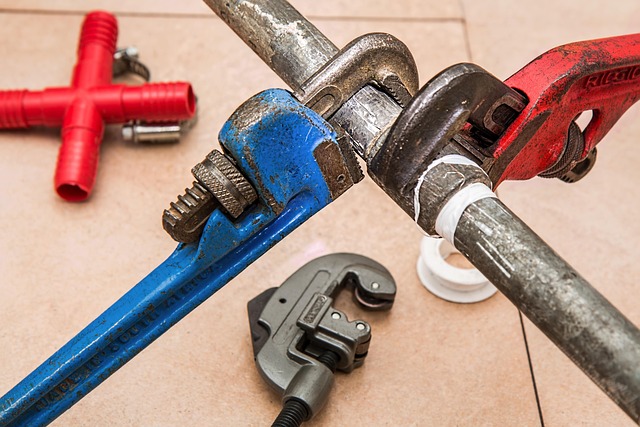
Materials and Tools for Effective Crack Repair
When undertaking crack repair on a concrete driveway, the right materials and tools are essential for achieving a durable fix. Concrete is robust but susceptible to cracks due to various factors like weather changes, settling, or heavy vehicles. To effectively mend these cracks, you’ll require specific products designed for concrete repair. This typically includes high-quality epoxy or polyurethane-based crack filling compounds, which offer excellent adhesion and resistance to environmental elements. These compounds come in a variety of forms, from syringes and cartridges to pourable liquids, catering to different crack sizes and levels of severity.
The right tools are equally vital. For smaller cracks, a simple putty knife or trowel will suffice for applying the filling compound. However, for wider gaps, you might need a hand saw or concrete cutting tool to clean and prepare the crack before application. Safety gear, such as gloves and eye protection, should always be worn during the repair process. Additionally, having a stable surface to work on and ensuring adequate ventilation will contribute to achieving the best results.
Step-by-Step Guide to Concrete Crack Repair

Concrete cracks can be unsightly and may even compromise the structural integrity of your driveway. Fortunately, repairing concrete cracks is a straightforward process that can be accomplished with the right tools and materials. Here’s a step-by-step guide to help you get started on crack repair:
1. Inspect and Clean the Crack: Begin by thoroughly inspecting the crack to determine its depth and width. Remove any debris or loose concrete from inside the crack using a wire brush or chisel. Make sure the area is clean and free of dirt or moss, as this can affect the adhesion of the repair material.
2. Mix Repair Compound: Prepare a mixture of concrete repair compound according to the manufacturer’s instructions. Typically, you’ll mix the compound with water in a wheelbarrow using a stiff brush or paddle mixer. The consistency should be thick but pourable.
3. Fill the Crack: Using a putty knife or trowel, force the repair compound into the crack, ensuring it fully fills the void. Tap lightly on the tool to compact the mixture and remove any air bubbles. Be careful not to overfill; you can always add more later if needed.
4. Smooth the Surface: Once the compound has set slightly (usually after a few minutes), use the putty knife or trowel to smooth the surface of the repair area, making it level with the surrounding concrete. This step ensures an even finish and helps prevent water from pooling in the crack.
Common Mistakes to Avoid During Repair Process

When repairing a concrete driveway, it’s easy to make mistakes that can compromise the effectiveness of the fix and lead to future damage. One of the most common errors is ignoring small cracks. While they might seem insignificant, neglecting crack repair can allow water to seep in, causing further structural issues. Always address cracks promptly to prevent widespread damage.
Another blunder is using the wrong materials or techniques. Using subpar products or incorrect methods can result in an unstable driveway surface. Ensure you choose high-quality sealers and fillers suitable for concrete and follow professional guidelines for application. Avoid DIY approaches if you’re unsure; consult with experts to achieve a durable, long-lasting repair.
Maintenance Tips for Longevity: Preventing Future Cracks

Regular maintenance is key to extending the life of your concrete driveway and preventing unsightly cracks. One of the most effective ways to avoid crack repair is to ensure proper drainage. Over time, water can seep into tiny gaps and freeze during colder months, causing the concrete to expand and contract, leading to cracks. Regularly inspect your driveway for any standing water or signs of poor drainage, and make necessary adjustments to ensure smooth, crack-free surfaces.
Another vital step is sealing your concrete annually. Sealing fills in microscopic pores, preventing moisture from penetrating the surface. This simple process creates a protective barrier that shields against freezing temperatures and UV rays, which can both contribute to driveway damage over time. By incorporating these preventative measures into your routine upkeep, you’ll significantly reduce the need for costly crack repair and keep your driveway looking its best for years to come.