
This text provides a comprehensive guide to faucet repair, focusing on common kitchen faucet issues like leaks, low water pressure, and difficult operation. It emphasizes preparation, including gathering the right tools and replacement parts, and understanding different faucet types for accurate diagnosis. The process involves turning off water supply valves, disassembling the faucet, replacing worn parts, reassembling, testing, and regular maintenance to prevent future problems. Keywords: Faucet Repair.
Tired of a leaky or unresponsive kitchen faucet? This comprehensive guide is your go-to for mastering the art of faucet repair. From pinpointing common issues to reassembling like new, we demystify the process. We’ll walk you through gathering the right tools and materials, identifying your faucet’s type, disassembling it with ease, replacing faulty parts effectively, and performing a successful test run. By the end, your kitchen faucet will be good as new, and you’ll have saved valuable time and money on faucet repair.
Understanding Common Kitchen Faucet Issues

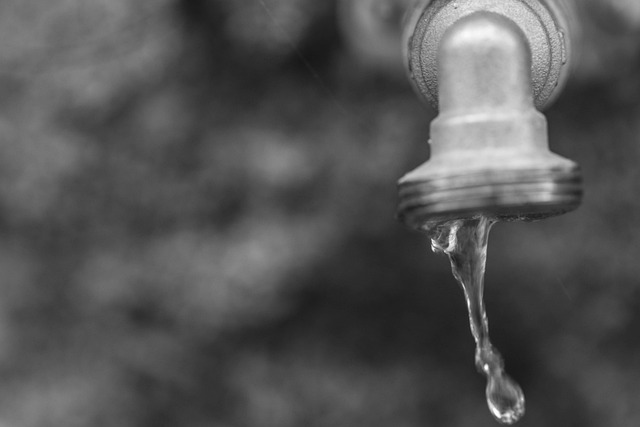
Common kitchen faucet issues can range from minor leaks to completely clogged sprays, often requiring simple faucet repair solutions. One frequent problem is a leaky faucet, which may be caused by worn-out O-rings or washers inside the faucet. Over time, these components can degrade and need replacement for proper sealing, stopping water leakage. Another typical issue involves low or reduced water pressure in the sprayer. This could be due to mineral buildup or clogged nozzles, easily resolved with regular cleaning or a simple nozzle replacement.
Moreover, if your kitchen faucet is difficult to turn or operate, it might indicate worn-out cartridges or valves. Cartridge replacements are relatively straightforward DIY projects for homeowners, allowing them to adjust water flow and temperature settings. Understanding these common issues is the first step towards effective and efficient faucet repair, ensuring a well-functioning kitchen workhorse.
Gather Tools and Materials for Repair
Before starting any faucet repair, it’s essential to gather the right tools and materials. For most standard faucet issues, a few basic tools will suffice: adjustable wrenches for gripping and turning components, pliers for tighter holds, and possibly a new O-ring or washer if the existing ones are worn out. Don’t forget to have access to replacement parts specific to your faucet model; these can usually be sourced from hardware stores or online retailers specializing in faucet repair supplies.
Having the right materials ensures a smoother repair process. Gather a variety of washers, O-rings, and gaskets that match your faucet’s design. These parts are often the culprits behind leaks and drippy faucets. Additionally, consider having some pipe sealants or thread seal tape on hand for any sealing tasks. Proper preparation will make the faucet repair more efficient and effective.
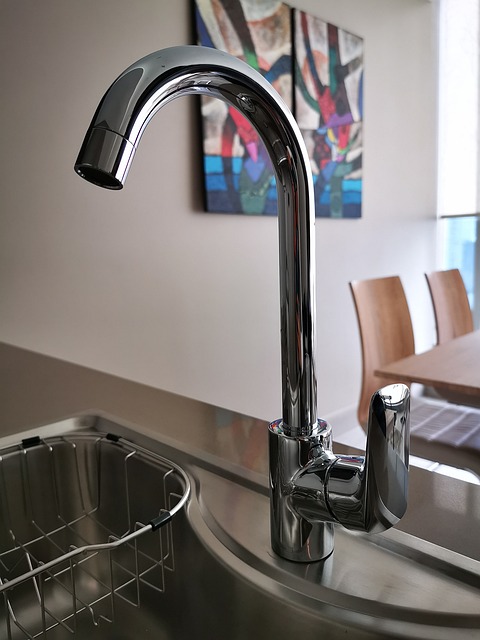
Identifying the Type of Faucet You Have
Identifying the type of faucet you have is a crucial first step in any faucet repair endeavor. Different models and brands often come with unique features, designs, and components. Familiarize yourself with the basic parts—such as cartridges, valves, and aerators—and their functions. This knowledge will enable you to accurately diagnose the problem and gather the necessary tools for repair.
Inspecting your faucet closely can provide valuable insights. Look for labels or markings that indicate the manufacturer and model. Additionally, consider the style—whether it’s a single-handle or dual-handle design—as this can influence the repair process. With a clear understanding of your faucet’s type, you’ll be better equipped to find specific replacement parts and ensure a successful faucet repair.
Step-by-Step Guide to Disassembling the Faucet
To begin disassembling your kitchen faucet for repair, first, turn off the water supply to prevent leaks and any accidents. Locate the shut-off valves under the sink and twist the handles clockwise to close them tightly. Next, gather all the necessary tools, including a wrench or pliers suitable for the size of your faucet’s components. Start by removing the handle and spout, usually done by unscrewing a base or nut securing these parts in place. Once exposed, carefully disconnect the supply lines from the faucet’s internal parts.
The next step involves detaching the cartridge or valve assembly. This may require unscrewing or unclipping it from its housing. Take note of how each part is connected to ensure accurate reassembly later. After removing the main valve, you might need to take additional steps depending on your faucet’s design, such as disassembling springs or seals. Documenting each step can be helpful for reference during the repair process.
Replacing Faulty Parts: A Comprehensive Overview

When undertaking a faucet repair, one of the most common tasks is replacing faulty parts. This process can range from simple to complex, depending on the issue and your level of comfort with DIY projects. The good news is that many common kitchen faucet issues stem from worn-out or damaged components, which are often easily accessible and replaceable.
The first step in replacing these parts is identifying them correctly. Common faulty parts include O-rings, cartridges, and aerators. Each part serves a specific function: O-rings seal the water lines to prevent leaks, cartridges control water flow and temperature, while aerators mix air with water to maintain pressure. After proper identification, you can procure replacement parts from hardware stores or online retailers, ensuring compatibility with your faucet model. During installation, follow manufacturer guidelines closely, double-checking connections and seals for a secure fit that prevents future leaks.
Reassembling and Testing the Repaired Faucet

After successfully replacing the damaged parts and tightening all connections, it’s time to reassemble the faucet. First, attach the supply lines back to the valves, ensuring a secure fit. Then, carefully put the faucet handle in place, aligning it correctly. Next, reinstall the faucet body, making sure all components are properly seated. Once everything is in order, turn on the water supply to test the repair. Check for any leaks at the connections and make sure the faucet functions as expected—opening and closing smoothly without drips or misaligned spray patterns. If all seems well, your faucet repair is complete.
Final Tips and Maintenance Suggestions

To keep your kitchen faucet in top condition and prevent future repairs, regular maintenance is key. Regularly inspect the faucet for any signs of damage or leaks. A simple visual check can catch issues early on. Additionally, lubricating the faucet’s moving parts with a light oil can help maintain smooth operation. This is especially important for older faucets.
When it comes to actual faucet repair, keep a basic toolkit ready. Have wrenches and pliers readily available to tackle tight connections. Remember to turn off the water supply before any repair work begins. This simple step can save you time and potential flooding. Lastly, consider keeping a spare set of O-rings and washers on hand; these are common wear parts that may need replacing over time.