
Faucet leaks stem from worn O-rings, washers, aerators, or loose connections. Prepare with tools, supplies, and knowledge of main water valve locations for safe shutdown during repair. Disassemble the faucet, inspect internal parts, and replace faulty components like O-rings, washers, gaskets (if needed). Regular maintenance—inspecting connections, lubricating parts, catching drips—prevents leaks and prolongs faucet life.
“Struggling with a leaky faucet? This comprehensive guide offers a step-by-step approach to fixing the issue. From identifying common causes like worn-out washers or bad cartridges, to gathering essential tools and disassembling the faucet, we’ve got you covered. Learn how to replace parts or sealants effectively and reassemble your fixture. Additionally, discover preventive maintenance tips to avoid future leaks and extend the lifespan of your faucet. Get ready to tackle this DIY project with confidence!”
Understanding Common Causes of Leaky Faucets
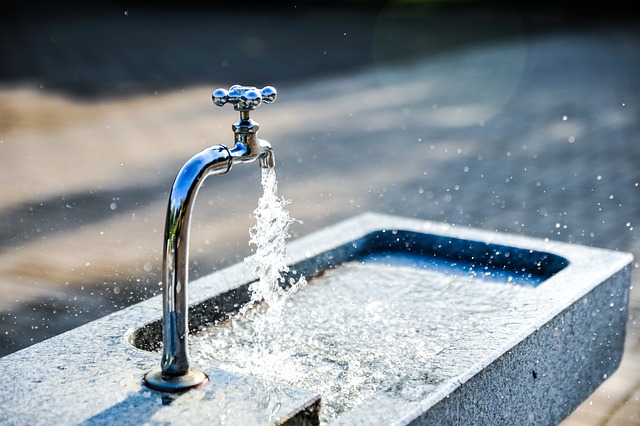
Leaky faucets are a common household issue, and understanding the root causes can make faucet repair an easier task. One of the primary reasons for leaks is worn-out or damaged O-rings or washer cartridges. These components are crucial in sealing the water flow, and over time, they can degrade due to mineral buildup, corrosion, or simply aging. Another frequent culprit is a loose connection between the faucet handle and the underlying valve mechanism, often caused by tight turns or improper installation. This can lead to an inconsistent seal, resulting in leaks.
Additionally, faulty or incorrectly installed aerators can also contribute to leaky faucets. Aerators are designed to mix air with water, ensuring a steady flow while reducing water pressure. If not properly adjusted or replaced, they might allow water to bypass the valve, causing leaks at the faucet spout. Identifying these issues is the first step in fixing a leaky faucet and preventing further wastage of water.
Gather the Necessary Tools and Supplies
Before you begin your faucet repair, make sure you have all the necessary tools and supplies on hand. This typically includes a wrench or pliers for removing components, replacement O-rings or washers, and possibly a new faucet handle if the damage is severe. A bucket or container to catch any excess water is also handy, especially if the leak is significant.
Gathering the right tools will save you time and frustration. Additionally, having these items readily available ensures that you can fix the issue promptly without needing to run to the store in the middle of your repair. Remember, a well-prepared DIYer is halfway there when it comes to successful faucet repair.
Turn Off the Water Supply Valves

Before tackling any faucet repair, ensuring the water supply is shut off is non-negotiable. Locate your home’s main water valves, typically found near the water meter or in a utility closet. These valves control the water flow to all fixtures, including your leaky faucet. Turn them clockwise to tighten and seal the shut-off stems, effectively cutting off the water supply to that specific fixture. This simple step is crucial for preventing further water waste and ensuring your repair process is safe and effective.
By shutting off the valves, you can proceed with your faucet repair without worrying about unexpected water gushes or floods. It also allows you to test each valve’s functionality, ensuring they work properly after the repair is complete. Remember, knowing how to shut off your water supply is a valuable skill for any homeowner and an essential step in the faucet repair process.
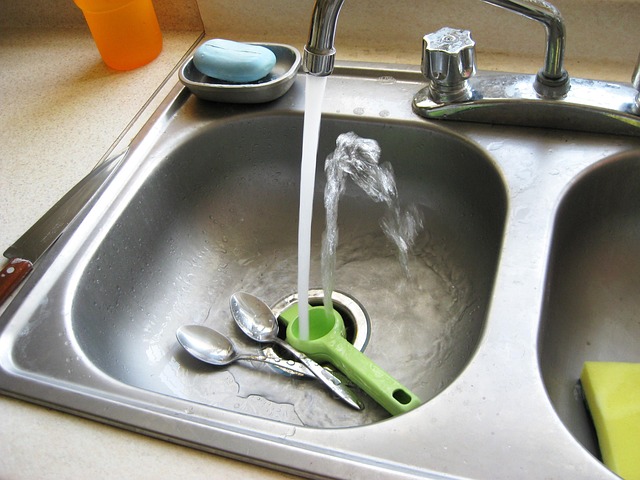
Disassemble the Faucet to Identify the Issue
When addressing a leaky faucet, the first step in effective faucet repair is to disassemble the faucet to identify the issue. Start by shutting off the water supply valves beneath the sink to prevent further wastage while you work. Then, remove the handle and any decorative caps to access the internal components. Inspect the faucet closely, looking for worn-out or damaged parts such as O-rings, washers, or cartridges. These are common culprits in leaky faucets, so replacing them may resolve the problem.
Take note of the specific design and model of your faucet, as different types may require unique disassembly procedures. Some faucets might have a single handle with an easily accessible cartridge, while others could be more intricate with separate hot and cold control mechanisms. Understanding these nuances will help you replace the faulty parts accurately during the faucet repair process.
Replace Worn-Out Parts or Sealants
If your leaky faucet isn’t easily fixed with a simple adjustment, it might be time to replace certain parts or sealants. Over time, faucet components like O-rings, washers, and gaskets can wear out, leading to leaks. These small parts are often affordable and easy to install, making them a quick solution for many common faucet repairs.
When replacing these items, it’s essential to use the right fit and materials compatible with your faucet. Most hardware stores carry a variety of faucet repair kits that include necessary parts and instructions. Remember, proper identification of your faucet model can make the part selection process smoother.
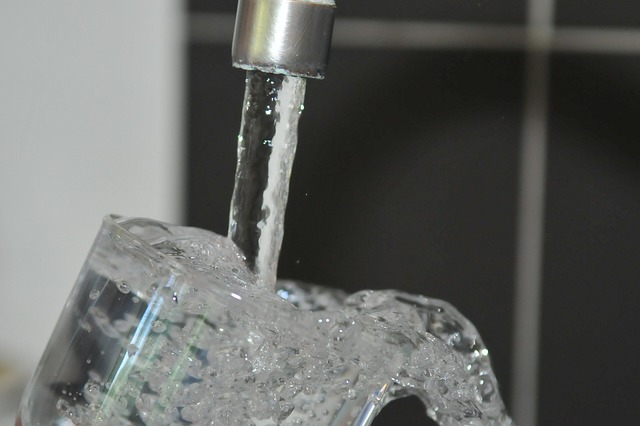
Reassemble and Test the Faucet for Leaks

After disassembling the faucet, carefully clean all components, especially the O-rings and cartridges. Reassemble the faucet according to the manufacturer’s instructions. Ensure that every part is correctly positioned and secured. Once reassembled, turn on the water supply valves completely. Then, twist the faucet handle to test its functionality. Observe if there are any leaks at the base, spout, or handles. If you notice persistent leaks, double-check for any loose connections or parts that require further tightening. It’s crucial to address these issues promptly to prevent unnecessary water waste and potential damage.
For effective faucet repair, regular maintenance is key. Periodically inspect your faucets for signs of wear and tear, including leaks and corrosion. Addressing these issues early can save you from more complex repairs in the future, ensuring a longer lifespan for your faucet.
Prevent Future Faucet Leaks: Maintenance Tips
To prevent future leaks, regular maintenance is key for your faucet repair and overall hygiene. Start by checking the connections periodically; tightener fixtures that have become loose over time can lead to leaks. Inspect the O-rings and washers for any signs of damage or wear and replace them if necessary.
Remember to lubricate the faucet’s moving parts with a silicone-based lubricant to ensure smooth operation and prevent rust. Additionally, keep an eye out for any water spots or drips beneath the sink, as these could indicate leaks that need immediate attention. Regular maintenance will not only save you from costly repairs but also ensure your home remains a leak-free, hygienic space.