
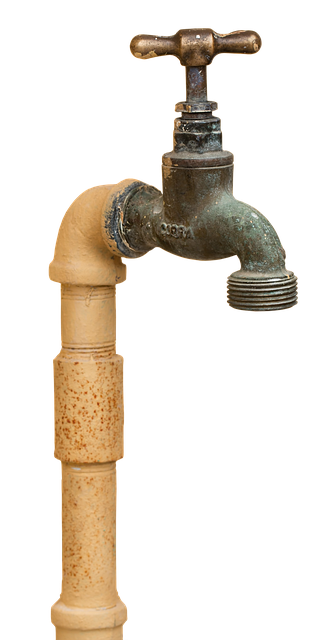
Faucet leaks are common household issues caused by worn O-rings, washers, loose connections, or outdated cartridges. Prepare with essential tools and sealants before isolating the water supply to prevent waste during repair. Disassemble the faucet, inspect parts for damage, replace faulty components, and test its integrity after repair. Regular maintenance, including tightening nuts, lubricating valve seats, and replacing O-rings, prevents future leaks and prolongs faucet life.
Is your faucet leaking? Don’t panic! This comprehensive guide offers effective solutions for fixing common faucet leaks. From identifying root causes like worn-out O-rings or damaged cartridges to gathering essential tools and materials, we’ve got you covered. Learn how to isolate water supply lines, disassemble the faucet, replace faulty parts, and tighten your repair for a leak-free experience. Plus, discover preventive measures to avoid future leaks, ensuring your faucet remains in top condition.
Understanding Common Faucet Leak Causes

Faucet leaks are a common household issue, often stemming from various factors that require attention for effective faucet repair. One of the primary causes is worn-out O-rings or washers inside the faucet mechanism. Over time, these components can deteriorate, allowing water to escape and creating an annoying drip. Another frequent culprit is loose connections; if the supply lines or fittings aren’t securely fastened, it can lead to leaks at the base or around the handle.
Additionally, outdated faucets with faulty cartridges or damaged parts may experience leaks due to internal structural failures. Even minor adjustments during normal use can cause these issues over time. Identifying the specific source of a leak is crucial for effective faucet repair, ensuring that the problem is resolved efficiently and preventing further water wastage.
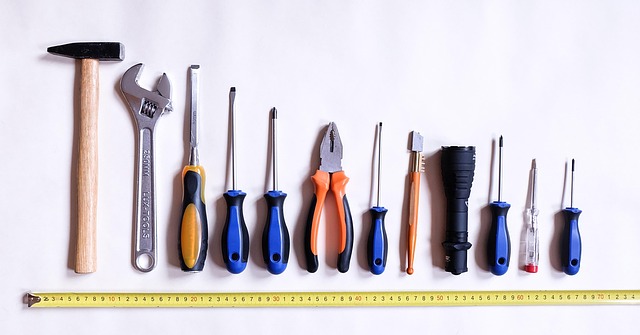
Gather Tools and Materials for Repair

Before tackling any faucet repair, ensure you have the right tools and materials on hand. A standard toolkit should include pliers, adjustable wrenches, and a set of screwdrivers (both flathead and Phillips). For older faucets with compact designs, a pair of channel locks might be necessary to grasp and turn tight parts. Don’t forget to gather replacement washers, O-rings, or other worn components specific to your faucet model. These parts are crucial for fixing leaks and ensuring a secure seal.
Additional materials like plumber’s tape, pipe compound, or silicone sealant will come in handy for sealing connections and preventing future leaks. Having these readily available will make the repair process smoother and more efficient. Remember, proper preparation is key to a successful faucet repair, so take some time to gather everything you need before starting.
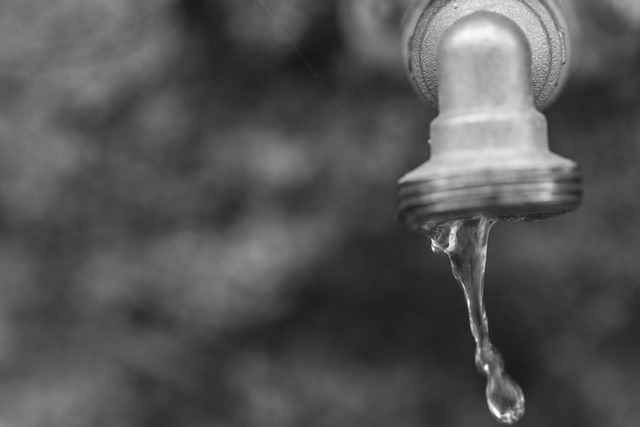
Isolating Water Supply to Control Leaks
When faced with a leaky faucet, one of the first steps in faucet repair is isolating the water supply to contain and control the leak. This process involves shutting off the water valves connected to the faucet, which can typically be found under the sink or in the basement. By doing so, you prevent any further wastage of water and make the repair process safer and more manageable.
Isolating the water supply is a crucial step before attempting any faucet repair. It allows for targeted troubleshooting, as you can check for leaks at the connections, O-rings, or cartridges without having to worry about flooding. Once the source of the leak is identified, replacing or repairing the faulty component becomes a straightforward faucet repair task.
Step-by-Step Guide to Faucet Disassembly

Before attempting any faucet repair, it’s crucial to understand that most modern faucets are designed for disassembly and easy replacement. This step-by-step guide will help you tackle a leaky faucet in no time. Start by turning off the water supply to your sink. The shut-off valves are typically located under the sink or behind the faucet. Once the water is cut off, gather the necessary tools: a wrench or pliers for removing the faucets and possibly some replacement parts if the damage is severe.
Now, carefully unscrew the faucet from the sink. Most faucets have a single handle and a separate spout. Remove the handle first, then take out the spout. Use your tools to loosen any nuts or screws holding these components in place. Keep track of where each part goes for easy reassembly later. Clean all disassembled parts thoroughly to ensure no debris or mineral buildup causes future leaks.
Identifying and Replacing Faulty Parts
When it comes to faucet leak solutions, identifying and replacing faulty parts is often a crucial step in effective faucet repair. Start by inspecting the visible components of your faucet for any signs of damage or wear. Common areas to check include the spout, handle, and base of the faucet. Look for cracks, loose connections, or dislodged parts that could be causing the leak.
Once identified, replacing these faulty parts can range from simple screw-on replacements to more complex procedures that may require specialized tools. Many hardware stores carry replacement parts specifically designed for various faucet models, making the repair process more accessible for homeowners. If you’re unsure about the repair, don’t hesitate to consult a professional plumber who can provide expert advice and ensure the job is done right.
Tightening and Testing the Repaired Faucet

After successfully replacing or repairing your faucet’s faulty parts, the next step is to ensure it functions correctly and efficiently. Begin by tightening any loose connections or components to prevent future leaks. Use a wrench or the appropriate tool suggested in your repair manual for this task. Once tightened, turn on the water supply valves connected to the faucet, one at a time, to test its integrity. Start with the cold water valve first, followed by the hot water valve if applicable. Observe if there are any signs of leaks around the base or handle of the faucet. If all seems well, you’ve successfully completed your faucet repair, eliminating any potential water wastage and saving costs.
Preventive Measures to Avoid Future Leaks
Regular maintenance is key to preventing future faucet leaks. Start by periodically inspecting your faucets for any signs of damage, corrosion, or loose parts. Tighten any loose nuts and bolts using a suitable wrench; this simple step can stop drips before they start. Consider lubricating the valve seats with a specialized grease to ensure smooth operation and reduce friction that could lead to leaks over time.
Additionally, keeping an eye on the condition of your faucet’s O-rings and gaskets is essential. These components wear out over time and are common leak culprits. Replacing them during routine maintenance can extend the life of your faucet and prevent costly repairs. Remember, proactive measures like these not only save you from unexpected leaks but also contribute to a longer-lasting faucet repair.