
This text provides a comprehensive guide to bathroom faucet repair, addressing common issues like leaks, low water pressure, and loud noises. It emphasizes proactive maintenance, proper tool selection (including model-specific replacement parts), step-by-step disassembly and reassembly, and the importance of testing after repair. Key focus areas include cartridge, washers, O-rings, and leak detection, ultimately aiming to extend faucet lifespan through effective DIY repair or professional assistance when needed.
Struggling with a leaky or clogged bathroom faucet? Don’t replace it; repair it! Understanding common issues is the first step. Gather your tools and materials for a successful DIY project. This guide will walk you through disassembling, troubleshooting, and replacing parts like cartridges, washers, and O-rings. By following these simple steps, you can save money and extend the life of your faucet. Learn how to effectively tackle common bathroom faucet repair tasks and get that sink flowing smoothly again.
Understanding Common Bathroom Faucet Issues

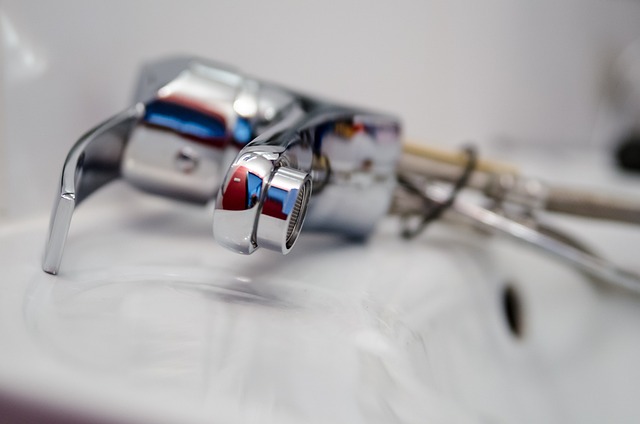
Faucets are an integral part of any bathroom, and they can start to show signs of wear and tear over time, leading to various issues that require faucet repair. Understanding these common problems is the first step in addressing them effectively. One of the most frequent issues is leaks, which can be caused by worn-out O-rings or damaged cartridges. These parts control the water flow and seal off the spout, so when they fail, water escapes, causing not only an annoying disturbance but also a potential waste of precious resources.
Another prevalent problem is reduced water pressure, often resulting in a weak or inconsistent spray. This issue might stem from mineral buildup inside the faucet, aerator, or water lines. Over time, these deposits can restrict water flow, leading to subpar performance and requiring faucet repair to restore proper pressure. Additionally, loud noises like banging or squeaking are not uncommon, especially in older faucets. Such sounds usually indicate issues with loose parts or worn-out seals, which can be addressed through simple repairs or replacement.
Gather Tools and Materials for Repair
Before starting any faucet repair, it’s crucial to gather the right tools and materials. For most basic faucet repairs, you’ll need a few essential items like adjustable wrenches, pliers, screwdriver (both flathead and Phillips), rubber gloves, and replacement parts specific to your faucet model (O-rings, cartridge, or washer). These tools will enable you to disassemble the faucet, replace damaged components, and ensure a proper seal.
When shopping for replacement parts, consider buying genuine manufacturer parts if available as they often fit better and last longer. Online marketplaces and hardware stores are reliable sources for these supplies. Always double-check the compatibility of the parts with your faucet model to avoid any inconvenience during the repair process.
Steps to Disassemble the Faucet

To begin disassembling your bathroom faucet for repair, gather the necessary tools: a wrench or pliers, and possibly a screwdriver. First, turn off the water supply to your faucet. This is crucial for any faucet repair to ensure no leaks occur during the process. Once the water is shut off, you can start taking apart the faucet. Begin by unscrewing the handle and removing it entirely. Then, with the help of your tools, carefully disconnect the spout from the base or valve assembly. Keep track of where each part belongs as you disassemble to make the reassembly process easier later.
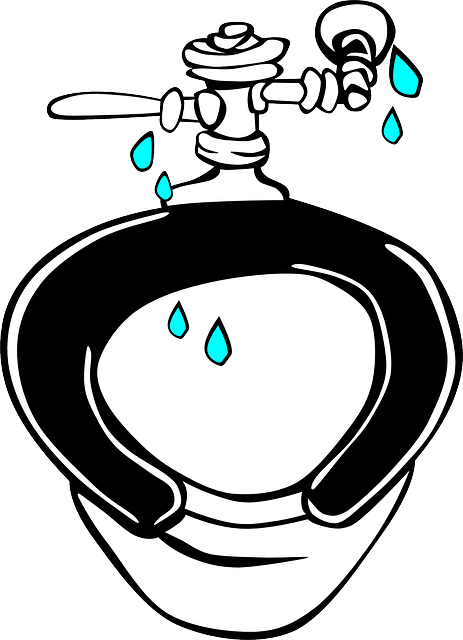
Troubleshooting Leaks and Clogs
When it comes to bathroom faucet repair, troubleshooting leaks and clogs is a common issue homeowners face. Leaks can often be identified by dripping water at the base of the faucet or around the handle. To fix this, check for loose connections, worn-out O-rings or gaskets, which are easy replacements that can stop the leak promptly. If your faucet is clogged, try using a plier to remove any debris or mineral buildup causing the blockage. A small snake or plunger can also clear minor clogs without resorting to harsh chemicals.
Regular maintenance, such as tightening connections and replacing worn parts, can prevent future leaks and clogs. For more complex issues, it’s advisable to consult a professional plumber who can diagnose and fix problems with precision, ensuring your bathroom faucet repair is done efficiently and effectively.
Replacing Parts: Cartridge, Washers, and O-Rings
When it comes to bathroom faucet repair, replacing certain parts is often a straightforward process that can extend the life of your fixture. Key components to consider are the cartridge, washers, and O-rings. The cartridge controls water flow and temperature, making it a common culprit for leaks or faulty operation. Washers and O-rings, responsible for sealing, can wear out over time, leading to drips and water waste.
Identifying these parts and understanding their functions is crucial for effective faucet repair. Many faucets have interchangeable cartridges, allowing you to easily swap them out. Washers and O-rings are typically located at the base of the spout or within the handle mechanism. Replacing these with new, compatible parts can resolve common issues like leaks, ensuring a secure fit and restoring your faucet’s functionality.
Final Assembly and Testing

After successfully replacing all the faulty parts, it’s time for the final assembly and testing phase of your faucet repair. This crucial step ensures that all components are securely in place and that the faucet functions properly. Begin by carefully assembling the faucet according to the manufacturer’s instructions, tightening any necessary bolts or screws with a wrench or screwdriver. Ensure all connections are tight to prevent leaks.
Once assembled, conduct a thorough test of the faucet repair. Turn on the water supply valves and observe if there are any leaks at the base or where the spout connects to the valve assembly. Check that the water pressure is adequate and that the temperature control works seamlessly. If all functions operate as expected, you’ve successfully completed your faucet repair.