Understanding wear and tear is crucial for maintaining tile and grout integrity. Regular inspections reveal damage like crumbling, chipping, discoloration, or gaps. To restore old tile and grout effectively, gather essential tools and materials including a tile cleaner, stiff brush, pressure washer, grout saw, new grout in matching color, mortar mix, trowel, rubber grout float, plastic sheeting, drop cloths, gloves, and goggles. Begin by removing old grout using a grout remover, scrub, and rinse thoroughly. Clean the surface with a wire brush or power washer, then etch using chemical solutions or mechanical methods to enhance adhesion. Mix fresh grout according to manufacturer instructions, apply evenly, and let set before sealing for durability. Re-grouting involves removing discolored grout, cleaning tiles, mixing fresh grout precisely, and wiping away excess. Techniques vary based on tile type: ceramic/porcelain, natural stone, or mosaic tiles. Finally, seal the restored area with a high-quality sealer every one to two years for longevity.
“Discover the secrets to breathing new life into your tired tile and grout with this comprehensive guide on deep repair. Learn how to identify worn-out areas, from damaged tiles to discolored grout, and transform them into a pristine, seamless finish.
We’ll walk you through the process step by step, from preparing the surface to applying the perfect amount of new grout compound. By the end, your space will be restored, enhancing both aesthetics and functionality. Say goodbye to outdated tile and grout—it’s time to master How to Restore Old Tile and Grout.”
Understanding Wear and Tear: Identifying Damaged Tile and Grout
Understanding Wear and Tear: Identifying Damaged Tile and Grout
Over time, tiles and grout in homes or commercial spaces can sustain significant wear and tear due to heavy foot traffic, exposure to water, stains, and environmental factors. Regular inspection is key to identifying damaged areas that require repair. Look for signs of crumbling, chipping, discoloration, or gaps between tiles—all indicators of potential issues. How to Restore Old Tile and Grout involves a careful assessment of these problems.
When navigating the process, it’s crucial to distinguish between damaged tiles and grout. Discolored or stained grout can often be restored with proper cleaning and re-grouting. Conversely, cracked or broken tiles may necessitate replacement. Proper identification will guide the repair process, ensuring that the chosen solution is effective and cost-efficient.
Tools and Materials Needed for Repair

To successfully restore old tile and grout, you’ll need a few specific tools and materials. Start with good-quality tile cleaner and a stiff brush for tackling stubborn stains and grime. A pressure washer or steam cleaner can also be beneficial, especially for deep cleaning hard-to-reach areas and removing tough grease buildup. For repairing damaged grout, a grout saw or chisel is essential to cut away the old, broken pieces precisely.
Don’t forget to have handy new grout in a matching color, mortar mix, a trowel for applying the grout, and a rubber grout float for smoothing. You may also need plastic sheeting, drop cloths, and safety gear like gloves and goggles to protect yourself during the repair process. Having these tools and materials readily available will ensure your How to Restore Old Tile and Grout project goes smoothly and efficiently.
Removing Old Grout: A Step-by-Step Guide

Removing old grout is a crucial step in deep tile and grout repair, allowing for a fresh start when restoring your tile’s beauty. Here’s a simple, step-by-step guide to help you achieve this:
1. Safety First: Put on protective gear including gloves, safety glasses, and a dust mask to avoid inhaling grout dust. Ensure the area is well-ventilated or consider working outside.
2. Scrape Off Excess Grout: Using a grout saw or a flat scraping tool, carefully scrape off any visible chunks of old grout from the tile joints. Be careful not to damage the tiles themselves.
3. Powdered Grout Remover: Sprinkle a powdered grout remover over the affected areas and let it sit for the recommended time on the product’s instructions, typically 15-20 minutes. This will soften and dissolve the old grout.
4. Clean with Warm Water: After the soaking time has elapsed, use a stiff-bristled brush or sponge to scrub away any remaining residue of the old grout. Rinse thoroughly with warm water to ensure all traces are removed.
5. Dry Thoroughly: Once clean and dry, you’re ready for the next step in your How to Restore Old Tile and Grout process.
Preparing the Surface: Cleaning and Etching for Better Adhesion

When preparing to restore old tile and grout, cleaning and etching the surface is a crucial step for achieving better adhesion during the repair process. Start by removing any loose debris, dirt, or mold using a wire brush or power washer. This initial cleaning ensures that the repair materials will bond effectively with the existing tile.
Next, etch the tile and grout surfaces to create micro-roughness, which enhances surface area contact and improves adhesion. Etching can be done chemically or mechanically. Chemical etching involves applying an acid solution, while mechanical etching uses abrasive tools like sandpaper or a shot blaster. This step is essential for creating a strong bond between the new repair materials and the old tile and grout.
Mixing and Applying New Grout Compound

Restoring old tile and grout involves a meticulous process, with one crucial step being the mixing and application of a new grout compound. To begin, gather your materials: a suitable grout mix designed for your tile type, a clean putty knife, a trowel, and protective gear. Ensure your workspace is well-ventilated to avoid inhaling any harmful fumes.
Follow the manufacturer’s instructions for mixing the grout compound, typically involving combining the powder with water in a bucket. Use the putty knife to apply the grout to the tile joints, filling them evenly. The trowel helps spread the grout uniformly and remove any excess. Allow the grout to set according to the recommended time frame before sealing it with a damp cloth or sponge. This process revitalizes not just the appearance of your tiles but also ensures a stronger, more waterproof seal.
Re-grouting: Tips for Achieving a Seamless Finish

When restoring old tile and grout, re-grouting is a crucial step for achieving a seamless finish. Begin by removing any loose or discolored grout using a grout removal tool or wire brush. Ensure the tiles are clean and free from debris to create a smooth surface for new grout.
Next, mix your grout according to the manufacturer’s instructions, achieving the correct consistency. Apply the fresh grout using a grout float, pressing it firmly into the tile gaps. Remove excess grout with the edge of the float, wiping away any residue. This meticulous process ensures a precise, seamless finish that complements your tiles.
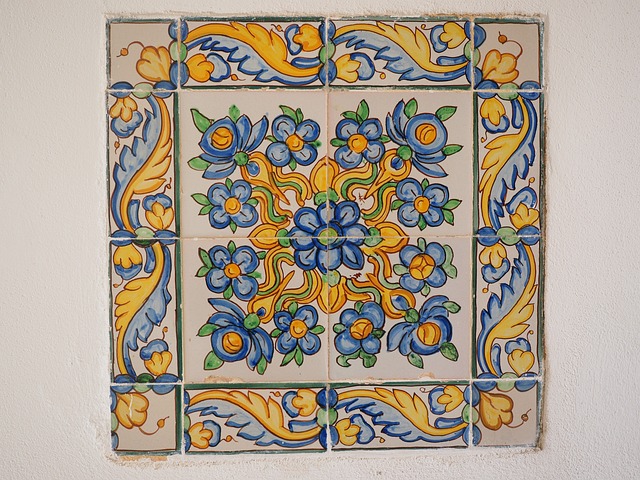
Restoring Tile Surfaces: Techniques for Different Types of Tiles
Restoring tile surfaces is a crucial step in deep tile and grout repair, especially for older tiles that have seen better days. The technique varies depending on the type of tile and its condition. For ceramic or porcelain tiles, a simple cleaning and regrouting process often does the trick. Start by removing any loose grout with a tool designed for this purpose. Then, thoroughly clean the tile and substrate to remove dirt, mold, and grime. After ensuring everything is dry, apply new grout, pressing it into the joints using a grout float. This process not only refreshes the appearance but also ensures the tiles are sealed against moisture and stains.
For natural stone tiles like marble or slate, a more delicate approach is required. These tiles often require specialized cleaning solutions to remove years of built-up residue without damaging the stone. Professional cleaners may use acid-based products or steam cleaning techniques to penetrate and lift away dirt. Once clean, any damaged areas can be repaired using stone-specific repair compounds, followed by polishing to restore the tile’s natural luster. For mosaic tiles with intricate designs, individual pieces might need to be replaced, requiring a keen eye for detail in matching colors and textures.
Final Touches: Sealing and Maintaining Your Repaired Tile and Grout

After completing the repair process, sealing your tiles and grout is a crucial final touch. This step involves applying a high-quality sealer to protect the newly restored surface from moisture, stains, and dirt. Sealing not only enhances the visual appeal but also extends the lifespan of your tile and grout, ensuring that your restoration project remains in top condition for years to come. Choose a sealer designed specifically for tiles and grouts, considering factors like durability, ease of application, and compatibility with your specific tile material.
Regular maintenance is equally vital for keeping your restored tile and grout looking their best. This includes regular cleaning with mild detergent and warm water, avoiding harsh chemicals that can damage the sealer. Additionally, sealing should be re-applied every one to two years, or as recommended by the manufacturer, to ensure ongoing protection against wear and tear. By following these simple maintenance practices, you’ll prolong the life of your How to Restore Old Tile and Grout project, keeping it looking fresh and vibrant for a long time.