
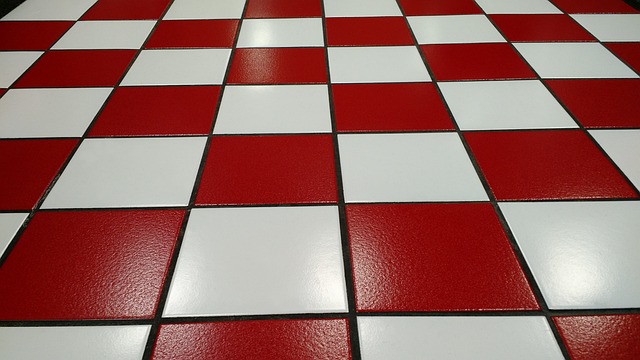
Grout stain removal requires understanding and addressing root causes like water damage, mold, dirt, and improper cleaning. Prepare workspace, mix a mild detergent solution, protect yourself, and gently remove stains with a soft-bristled brush or sponge. Choose the right cleaner based on stain type (oil-based vs. water-soluble), test small areas, and consider grout material. Regular cleaning and prompt spill response prevent future staining. Avoid common mistakes like skipping pre-cleaning, using unsuitable cleaners, over-scrubbing, and not allowing enough time for cleaner penetration. Maintain grout with regular pH-neutral detergent cleaning and sealing to protect against moisture, oil, and stains.
Tired of unsightly grout stains ruining your tile’s aesthetic? Discover expert solutions for effective grout stain removal. This comprehensive guide breaks down the science behind grout stains, offering valuable insights on preparation and prevention. Learn how to choose the best cleaning agents and master a step-by-step removal process. Additionally, avoid common mistakes and ensure long-lasting grout integrity. Implement these strategies to restore your tiles’ gleam and maintain a spotless home environment.
Understanding Grout Stain Causes
Grout stain removal can be a challenge, but understanding the root causes is the first step to achieving pristine results. Stains in grout often arise from several factors, including water damage, mold and mildew buildup, dirt and grease accumulation, and even improper cleaning methods. Water penetration can weaken grout, making it susceptible to staining, while mold and mildew thrive in damp environments, leaving behind unsightly marks. Over time, oil, grime, and other debris can embed themselves in the porous grout structure, leading to discoloration.
To combat these issues effectively, it’s crucial to identify the specific stain cause. For instance, addressing water damage may involve repairing leaks or using grout sealers. When mold or mildew is the culprit, a combination of cleaning solutions and dehumidification might be necessary. Regular deep cleaning routines with appropriate tools and products can prevent future stains from forming, ensuring your grout remains fresh and vibrant.
Preparing for Grout Stain Removal
Before tackling grout stain removal, it’s crucial to prepare your workspace and gather the right tools. Start by vacuuming or sweeping the floor to remove any loose debris or dirt. This step is essential as it prevents particles from getting in the way during the cleaning process. Next, mix a solution of warm water and mild detergent, ensuring the mixture is not too strong to avoid damaging the grout. Test the solution on a small, discreet area first to verify its effectiveness and safety. Additionally, consider wearing protective gear like gloves and goggles for your safety and to prevent skin or eye irritation.
Once prepared, remove any loose stain with a soft-bristled brush or sponge. Be gentle to avoid pushing the stain deeper into the grout lines. After initial cleaning, rinse the area thoroughly with clean water to eliminate any soap residue. It’s important to act promptly when dealing with grout stains as they can set and become more challenging to remove over time. Regular maintenance and prompt cleaning are key to keeping your grout looking fresh and pristine.
Choosing the Right Cleaning Agents

When it comes to tackling grout stain removal, selecting the appropriate cleaning agents is a critical first step. Different stains require specific solutions, so identifying the type and severity of the stain is essential. For example, oil-based stains might need a solvent-based cleaner, while water-soluble stains can often be treated with eco-friendly enzymatic cleaners or natural ingredients like baking soda and vinegar.
Choosing the right agent ensures that you’re not just temporarily masking the stain but effectively eliminating it at its source. Always consider the material of your grout—ceramic, porcelain, or stone—as some materials may require gentle care to prevent damage from harsh chemicals. Additionally, testing a small, inconspicuous area first is recommended to ensure compatibility and avoid unwanted discoloration.
Step-by-Step Grout Stain Elimination Process

Removing grout stains can be a tedious process, but with the right approach, it’s achievable. Here’s a straightforward step-by-step guide for effective grout stain elimination. Start by identifying the type and severity of the stain. Different stains may require specific cleaning agents or techniques. Light to moderate stains can often be treated with warm water and a mild detergent. Mix a small amount of liquid dish soap with warm water, and use a soft-bristled brush or cloth to gently scrub the stained area. Rinse thoroughly with clean water afterward.
For more stubborn stains, consider using specialized grout stain removers available in the market. Follow the product instructions for best results. After applying the remover, allow it to sit for a few minutes before scrubbing gently and rinsing. For deep-set or hard-to-reach stains, a mixture of baking soda and vinegar can be effective. Create a paste by combining equal parts of each ingredient, apply it to the stain, let it sit for 15-20 minutes, then scrub away the residue with a damp cloth. Regular maintenance and prompt cleaning after spills are key to preventing grout stains from reappearing.
Common Mistakes to Avoid During Stain Removal

When tackling grout stain removal, it’s essential to understand common mistakes that can hinder your progress and prolong the cleaning process. One of the biggest blunders is attempting to skip the pre-cleaning step; this initial phase involves gently removing loose debris and grime with a soft brush or cloth. Skipping it may lead to more stubborn stains remaining. Additionally, using the wrong cleaner for your grout type can be counterproductive; different grouts require specific solutions to avoid damaging their finish.
Another mistake to avoid is over-scrubbing, which can exacerbate the issue and cause further damage. Opt for a mild cleaning approach with a soft-bristled brush or a microfiber cloth to gently agitate the stain without rough handling. Moreover, not allowing sufficient time for the chosen cleaner to penetrate the grout lines can result in incomplete removal. Always follow product instructions, ensuring adequate contact time for optimal stain elimination.
Maintaining Grout for Longevity

Maintaining grout for longevity is a crucial aspect of ensuring your tiles remain in pristine condition and prevent unsightly grout stain removal issues down the line. Regular cleaning with mild, pH-neutral detergents can help remove dirt and grime buildup, keeping grout lines fresh and vibrant. Avoid using harsh chemicals or abrasive tools that could damage the grout material over time.
Additionally, sealing your grout regularly is an effective measure to protect it from moisture, oil, and stains. Sealants create a protective barrier on the grout surface, making it easier to clean and maintain. Regular inspection and prompt attention to any signs of discoloration or moisture intrusion can also contribute to prolonged grout health, ensuring your tile work stays looking as good as new for years to come.