
Concrete floor cracks vary in severity, from aesthetic to structural issues requiring prompt Crack Repair. Understanding causes like shrinkage or settlement is vital for accurate diagnosis. Surface preparation involves cleaning and scraping to ensure proper bonding of repair material. Using epoxy for heavy-duty areas and polyurethane for flexible movement offers long-lasting solutions. Cleaning, filling with latex/polymer filler, smoothing, drying, and sealing are key steps in Crack Repair. Regular maintenance, including proactive crack repair and suitable coatings, extends concrete floor lifespan by preventing moisture intrusion and environmental damage. Correct techniques, using appropriate materials and depth of patching, ensure effective and long-lasting Crack Repair.
Concrete floor cracks can mar the aesthetics and structural integrity of any space. Luckily, crack repair is not only feasible but also essential for maintaining your concrete surface. Understanding the causes and types of cracks is the first step in effective patching. This article guides you through the process, from identifying issues to choosing the right materials, providing a step-by-step approach to crack repair and vital tips for long-term maintenance. Learn how to avoid common mistakes and restore your concrete floors to their optimal condition.
Understanding Concrete Floor Cracks: Causes and Types
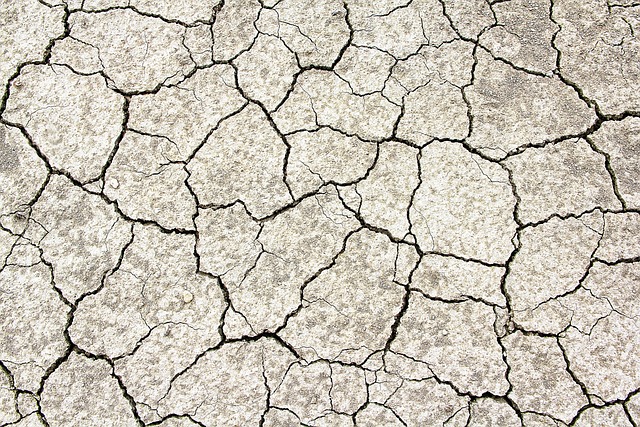
Concrete floor cracks can range from minor aesthetic issues to serious structural problems, necessitating prompt crack repair. Understanding the causes and types of cracks is essential for effective patching. These may include stress cracks caused by concrete shrinkage or movement, which are typically surface-level and appear as diagonal lines. Settlement cracks result from uneven settling of the concrete substrate, often occurring due to poor initial installation or nearby construction activities. Bulge cracks, on the other hand, indicate underlying structural issues such as weak steel reinforcement or excessive loading. Identifying the type of crack is crucial in selecting the appropriate crack repair method.
Preparations for Patching: Cleaning and Surface Preparation
Before beginning any crack repair, it’s crucial to prepare the concrete surface properly. The first step is thorough cleaning to remove any loose debris, oil, or grease that might hinder the patching process. Use a pressure washer or a degreasing agent to ensure the area is spotless. This step is essential as it creates a clean canvas for the patch material to adhere to effectively.
Once cleaned, the surface should be prepared further by removing any loose concrete or rough patches. Chipping away at the damaged area with a hammer and chisel or using an angle grinder with a cup wheel will ensure a smooth base. This preparation is vital as it promotes better bonding of the patch material with the existing concrete, leading to longer-lasting crack repair.
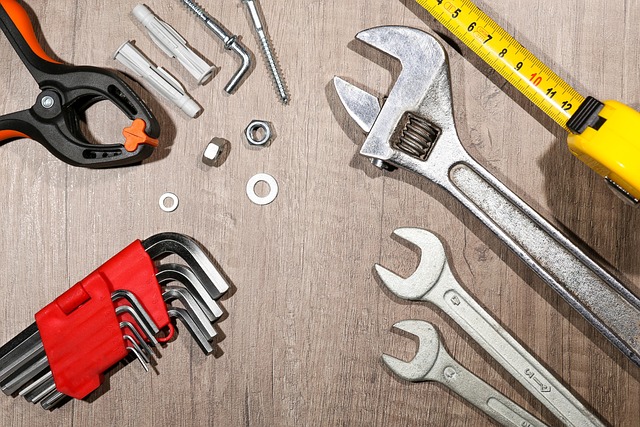
Choosing the Right Materials: Epoxy vs. Polyurethane

When it comes to concrete floor patching, selecting the appropriate material is a crucial step in ensuring long-lasting repair. Two commonly used options are epoxy and polyurethane, each with its own unique properties that make them suitable for different crack repair scenarios. Epoxy, known for its superior strength and chemical resistance, is an excellent choice for heavy-duty applications, such as industrial floors or areas exposed to harsh chemicals. It provides a robust bond and can withstand significant wear and tear, making it ideal for crack repairs in high-traffic zones.
On the other hand, polyurethane offers a more flexible solution, which makes it perfect for scenarios where movement and slight adjustments are expected, like temperature changes or subtle concrete shifts. Polyurethane has excellent adhesion properties and is less prone to cracking under stress, providing a more forgiving surface for areas with potential future movement. For smaller cracks in residential settings or places requiring a more aesthetically pleasing finish, polyurethane can offer a durable and visually appealing repair.
Step-by-Step Guide to Crack Repair

To begin your crack repair, start by cleaning the cracked area thoroughly. Remove any loose debris or dirt using a wire brush or vacuum to ensure proper adhesion for the patch material. Next, wet the concrete surface slightly with a garden hose; this step helps in achieving better bonding between the new and old concrete.
Apply an appropriate crack-filling compound, usually a latex-based product designed specifically for concrete cracks, using a putty knife. Fill the crack completely, pressing the compound firmly to ensure it sets correctly. For wider cracks, consider using a specialized polymer-based filler for superior strength. Once applied, smoothen the surface with the putty knife and allow it to dry according to the manufacturer’s instructions before applying any finishing touches or sealing the area to protect against future damage.
Tips for Effective Long-Term Maintenance

To ensure long-term concrete floor longevity, regular maintenance is key. One of the most effective practices is proactive crack repair. Even minor cracks can widen over time, leading to more extensive damage and costly repairs. Therefore, it’s essential to regularly inspect floors for any signs of cracking and fill them promptly using suitable epoxy or polyurethane-based products. These materials not only mend the surface but also prevent moisture penetration, which could further weaken the concrete.
Additionally, maintaining a clean environment is crucial. Regular sweeping and mild pressure washing remove dirt, oil, and other debris that might attract moisture, causing the patch to fail faster. Also, consider applying a suitable sealer or coating to protect the patched area, enhancing its durability against environmental factors and heavy foot traffic.
Common Mistakes to Avoid During Patching

When patching a concrete floor, it’s crucial to avoid common mistakes that can compromise the longevity and aesthetics of your repair job. One frequent blunder is using the wrong patch compound for the task; ensuring the right consistency and mixture is vital for a strong bond with the existing concrete. Using too much water or adding incorrect additives can weaken the patch, leading to premature cracking and heaving.
Another mistake is neglecting preparation. Concrete surfaces must be thoroughly cleaned, dried, and roughened to ensure adequate adhesion. Ignoring this step results in a patch that fails to bond properly, especially in damp conditions. Additionally, inadequate patching depth is a frequent issue; patches should extend below the surface crack to prevent future damage from water infiltration and freeze-thaw cycles.