
Slab restoration, focusing on crack repair, is a meticulous process aiming to enhance both structural integrity and visual appeal of concrete slabs. Prompt addressing of cracks caused by settlement, environmental factors, or age degradation is essential for slab longevity. The repair process involves assessing crack extent and type, cleaning the area, injecting appropriate epoxy or polymer filler, and smoothing it to match surrounding surface. Best practices include thorough preparation, using high-quality sealers or epoxy compounds, regular maintenance, and avoiding common mistakes like DIY repairs without proper knowledge or subpar products. Regular crack repair with protective barriers and proper drainage around foundations significantly extends slab lifespan while preserving structural integrity and aesthetic appeal.
Slab restoration is a crucial process for maintaining the structural integrity and aesthetic appeal of concrete slabs. This comprehensive guide delves into the essentials of crack repair, offering insights into understanding slab cracks, materials, step-by-step repairs, best practices, common mistakes to avoid, and preventive maintenance tips. By mastering these aspects, you’ll be equipped to effectively address crack repair, ensuring long-lasting results and preserving the stability of your slabs. Learn how to identify issues early and implement solutions for a solid, safe, and visually appealing surface.
Understanding Slab Restoration: The Basics of Crack Repair
Slab restoration, particularly crack repair, is a meticulous process aimed at restoring the structural integrity and aesthetic appeal of concrete slabs. Cracks in slabs can arise from various factors including settlement, environmental conditions, or age-related degradation. Prompt addressing of these cracks is crucial to prevent further damage and ensure the longevity of the slab.
The basics of crack repair involve several steps. First, the extent and type of crack are assessed. Next, the crack is cleaned and prepared for filling. This preparation often includes removing loose concrete and ensuring the crack is free from debris. After cleaning, a suitable epoxy or polymer-based filler is selected based on the crack’s width and depth. Finally, the filler is injected into the crack and smoothed to match the surrounding slab’s surface.
Identifying Common Causes of Slab Cracks

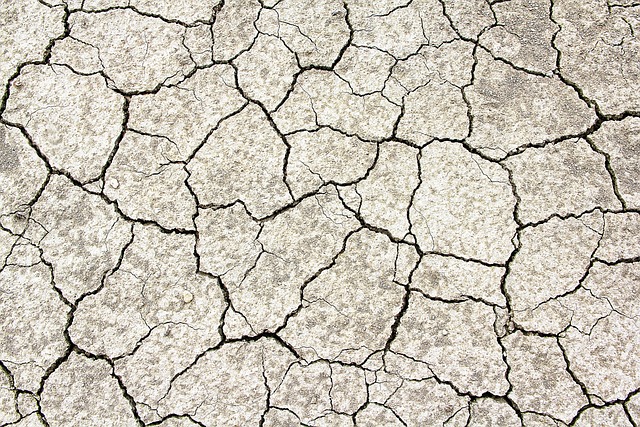
Slab cracks can be both aesthetically displeasing and structurally concerning. Identifying the common causes behind these cracks is a crucial first step in effective slab restoration. One of the primary culprits is settlement, often occurring due to uneven soil distribution or changes in temperature and humidity levels. This phenomenon leads to differential movement, resulting in cracks that can vary in width and depth.
Another frequent cause is shrinkage, particularly in newly poured slabs. As concrete sets and hardens, it shrinks slightly, which, if not accounted for in the initial design, can cause cracks to form. Additionally, structural defects, such as poor initial installation or underlying damage from heavy loads or recurrent traffic, can contribute to slab cracking. Prompt identification of these issues is key to effective crack repair and ensuring the longevity of your slab structure.
Types of Materials Used in Slab Restoration
When it comes to slab restoration, the choice of materials plays a pivotal role in achieving both functionality and aesthetics. Modern crack repair techniques offer a range of options, from traditional concrete blends to advanced polymer-based compounds. These materials are selected based on their ability to seamlessly bond with existing concrete, providing a durable fix that prevents further damage.
For smaller cracks, standard epoxy injections or cement-based filler mixes can effectively fill and strengthen the affected area. In contrast, larger or more complex cracks might require specialized products like fiber-reinforced composites or polyurethane foams. These innovative materials not only repair but also enhance the slab’s strength and flexibility, ensuring longevity and a smoother surface for years to come.
Step-by-Step Guide to Effective Crack Repair

Crack repair in slabs is a crucial process that involves several meticulous steps to ensure structural integrity and aesthetic appeal. Here’s a step-by-step guide for effective crack repair:
1. Assessment: Begin by thoroughly inspecting the cracked slab to determine the extent of damage. Identify the type of crack (e.g., hairline, diagonal, vertical) and its width. This information is vital for choosing the appropriate repair method.
2. Preparation: Clean the crack area using a pressure washer or a strong degreasing agent to remove any loose debris, oil, or grime. Ensure the surface is dry before proceeding. Apply a primer to the crack to improve adhesion; this step is essential for long-lasting repairs.
3. Filling the Crack: Use a high-quality epoxy injection system to fill the crack from both sides. This process involves drilling small holes at regular intervals and injecting the epoxy, which expands to fill the crack completely. Allow the epoxy to cure according to the manufacturer’s instructions.
4. Surface Treatment: Once the epoxy has cured, lightly sand the repaired area to create a smooth surface that matches the surrounding slab. Apply a final coat of sealant or paint to match the original finish, ensuring a seamless repair that’s barely noticeable.
Best Practices for Ensuring Long-Lasting Results

When it comes to slab restoration, implementing best practices is paramount to achieving long-lasting results. One of the most crucial steps is thorough crack repair. Before any restoration begins, cracks should be meticulously identified and filled using high-quality sealers or epoxy compounds. This prevents further damage and ensures a smooth surface that can withstand wear and tear.
Regular maintenance is another key practice. After crack repair, it’s essential to establish a schedule for inspecting the slab and reapplying protective coatings as needed. These coatings serve as a barrier against moisture, chemical spills, and other environmental factors that could lead to degradation. By combining crack repair with proactive maintenance, you can significantly extend the lifespan of your slabs, maintaining their structural integrity and aesthetic appeal.
Common Mistakes to Avoid During Slab Restoration

When it comes to slab restoration, avoiding common mistakes is key to achieving a lasting and high-quality result. One of the biggest blunders homeowners make is attempting DIY crack repair without proper knowledge or tools. Concrete slabs are intricate structures, and cracks can be indicative of larger issues beneath the surface. Attempting an amateurish fix could lead to further damage and costly repairs down the line. It’s best to leave this task to professionals who have the expertise to identify the root cause of the crack and employ suitable methods for repair.
Another mistake to steer clear of is neglecting proper preparation before applying any crack-filling or sealing products. Slabs must be thoroughly cleaned, dried, and treated to ensure optimal adhesion of the restoration materials. Using subpar products or failing to follow manufacturer instructions can result in poor bonding, leading to future crack reappearance. Always use high-quality, industry-approved products and adhere to the recommended application procedures for the best outcomes in crack repair.
Maintenance Tips for Preventing Future Slab Damage

Regular maintenance is key to preventing future slab damage. One of the most crucial steps is to perform crack repair as soon as any cracks appear. Even small cracks can worsen over time, leading to more extensive and costly repairs. Fill these cracks with a high-quality epoxy or polyurethane sealant to create a protective barrier against moisture intrusion and further weakening.
Additionally, ensuring proper drainage around the slab is essential. Promptly address any water accumulation near the foundation, as it can exert pressure on the slab, causing cracks and other damage. Regularly inspect and clear drainage channels, downspouts, and gutters to prevent clogs that could lead to standing water issues.