
Understanding grout stain causes—from spills to mineral deposits and mold—is key for effective removal. Prepare by gathering tools, testing cleaners on hidden areas, and protecting surfaces. Choose the right cleaning solutions based on stain type and grout material. Scrub vigorously after soaking, then rinse thoroughly. Avoid harsh chemicals and identify root causes to prevent future staining. Regularly maintain grout through frequent mopping and deep cleaning every two weeks. For stubborn stains, consult professionals for expert Grout Stain Removal.
Professional grout stain cleaning is a must for maintaining the freshness of your spaces. This guide delves into the intricate world of grout stain removal, offering comprehensive insights tailored for both DIY enthusiasts and professionals. From understanding the causes of stubborn stains to mastering effective cleaning techniques, we equip you with the knowledge needed to achieve immaculate results. Discover proven strategies, learn from common mistakes, and explore maintenance tips to ensure long-lasting protection.
Understanding Grout Stain Causes
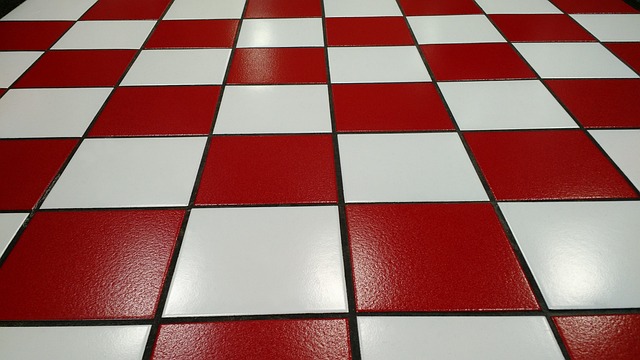
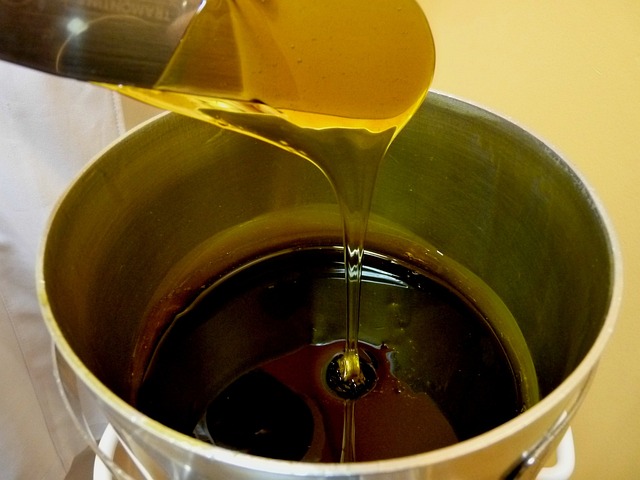
Grout stain causes can vary, but understanding them is key to effective grout stain removal. From everyday spills and splashes to mineral deposits and mold growth, various factors contribute to the accumulation of stains in these often-overlooked spaces between tiles. Knowing the root cause of a specific stain is crucial for selecting the right cleaning method and products. For instance, oil-based stains might require a stronger detergent, while water-based stains may respond better to natural cleaners like vinegar or baking soda.
Regular cleaning and sealing play a vital role in preventing grout stains from forming in the first place. Sealing the grout with a high-quality product creates a protective barrier, repelling liquids and reducing the chances of stain absorption. Consistent maintenance, coupled with prompt cleanup of spills, can significantly extend the life of your grout and reduce the need for intensive grout stain removal efforts.
Preparation for Grout Stain Removal
Before tackling grout stain removal, a thorough preparation is key to achieving the best results. Begin by gathering the necessary tools and supplies, including a good quality grout cleaner, a scrub brush designed for grouts, protective gear like gloves and goggles, and a bucket filled with warm water. Remove all furniture or objects from the stained area to ensure easy access and prevent any damage during the cleaning process. Empty and clean the floor drains to avoid any blockage and allow proper water flow while scrubbing.
Additionally, identify the type of stain you’re dealing with—whether it’s from soap scum, mold, mildew, or food—as different stains may require specific treatments. Test a small, hidden area first to ensure the chosen cleaner is suitable for your grout material, preventing any potential discoloration or damage. Protect surrounding surfaces with drop cloths or plastic sheeting to keep them stain-free during the cleaning process.
Choosing the Right Cleaning Solutions

When it comes to tackling grout stain removal, selecting the appropriate cleaning solutions is a critical first step. Different stains require specific treatments, and using the right product ensures optimal results. For instance, enzymatic cleaners are effective for organic stains like coffee or wine, while acid-based solutions work wonders on mineral deposits and hard water stains. Always consider the type of grout you have, as some materials may be more susceptible to certain chemicals.
Choosing the right cleaner involves understanding your stain’s nature and the grout material. Natural stone grouts might need pH-neutral cleaners to avoid damage, whereas porcelain or ceramic grouts can often handle stronger acid-based solutions. Testing a small, hidden area first is recommended to ensure the safety and effectiveness of your chosen cleaning solution on the grout’s surface.
Effective Grout Cleaning Techniques

Effective grout stain removal requires a combination of the right tools and techniques. Start by vacuuming or sweeping the floor to eliminate loose dirt and debris. Next, apply a grout cleaner directly onto the stained areas, following the product’s instructions for proper dilution and application time. Let the cleaner sit for several minutes to allow it to penetrate the grout lines, then scrub vigorously with a stiff-bristled brush to dislodge any lingering stains.
Rinse the floor thoroughly with warm water after scrubbing, ensuring all cleaning solution is removed. For stubborn stains, consider using a mixture of baking soda and vinegar or a commercial grout stain remover for deeper cleaning. Regular maintenance is key; regularly mop and dry your floors to prevent future staining and prolong the life of your grout.
Common Mistakes to Avoid

When tackling grout stain removal, it’s easy to fall into common pitfalls that can hinder your progress and leave stains lingering. One major mistake is using aggressive cleaning agents or scrubbers on grout, which can damage its surface and even promote further staining. Grout is a porous material, so always opt for a gentle approach and mild, pH-neutral cleaners to avoid exacerbating the issue.
Another error to steer clear of is neglecting to identify the root cause of the stain. Different stains require specific cleaning methods. For example, mold or mildew stains need a blend of water, bleach, and a grout cleaner, while oil or grease stains might call for a mild detergent and warm water solution. Proper diagnosis is key to successful grout stain removal without causing further damage or requiring more intensive measures.
Maintenance Tips for Long-Lasting Results
Regular maintenance is key to keeping your grout stain-free and looking like new. After professional cleaning, it’s essential to follow up with routine cleaning practices to prevent future stains from setting in. Start by sweeping or vacuuming your floors daily to remove loose dirt and debris that can lead to staining. Use a microfiber cloth to wipe down the grout lines weekly, ensuring you get rid of any spills or marks promptly.
For deeper cleaning, consider using a mild grout cleaner or a mixture of warm water and baking soda every two weeks. Apply the solution with an old toothbrush or grout brush, scrub gently, and rinse thoroughly. Remember, regular care will extend the life of your clean grout, saving you time and money on future stain removal efforts.
When to Consider Professional Help

If your grout is stained and you’ve attempted at-home cleaning methods, it might be time to consider professional help for effective grout stain removal. Grout, due to its porous nature, can absorb stains easily, especially from common substances like coffee, tea, ink, or even mold and mildew. Over-the-counter cleaners may not penetrate deep enough to lift these stubborn stains.
Professional grout cleaning services employ specialized equipment and chemicals designed to tackle tough grout stains without damaging the surrounding tile. They have the expertise and experience to identify the type of stain and choose the right approach for safe and thorough removal, leaving your grout looking fresh and new again.