
Understanding common faucet issues like leaks and dripping water empowers DIY enthusiasts to save on professional plumbers. Regular inspection and maintenance catch problems early, prolonging faucet lifespan. Online resources teach basic faucet repair skills, allowing folks to tackle common issues confidently. For complex or older fixtures, professional assistance is recommended for long-lasting solutions. Accurate identification of faucet model and replacement parts ensures successful emergency repairs.
Faucet leaks and clogs are common household issues that can quickly turn into annoying headaches. Understanding basic faucet repair is an essential skill that every homeowner should possess, saving you time and money. This comprehensive guide covers everything from fixing a leaking faucet to replacing an old one. We’ll walk you through the tools needed, troubleshooting tips, and when to call in a professional plumber. By mastering these skills, you can effectively tackle faucet repairs, ensuring a leak-free and smooth-operating kitchen or bathroom.
Understanding Common Faucet Issues
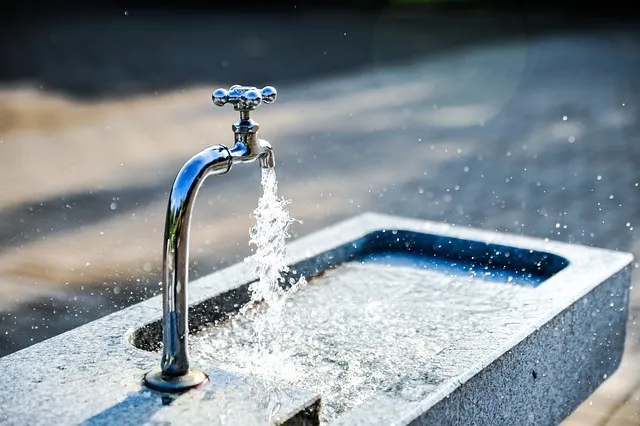
Many common faucet issues can often be easily diagnosed and repaired, saving you time and money on costly plumber visits. Familiarizing yourself with potential problems is the first step in effective faucet repair. Leaks, for instance, are usually caused by worn-out O-rings or cartridge malfunctions. Dripping water may indicate a loose connection or a faulty valve seat. If your faucet won’t turn on, it could be due to a disconnected supply line or a faulty control valve. Understanding these basic issues empowers homeowners to tackle minor repairs themselves, reducing the need for professional intervention.
By regularly inspecting and maintaining your faucets, you can catch potential problems early on. This proactive approach not only extends the lifespan of your fixtures but also prevents more severe damage from occurring. Simple troubleshooting guides and DIY repair videos are readily available online, making it accessible for anyone to learn basic faucet repair skills and tackle common issues with confidence.
Tools Needed for Faucet Repair
Steps to Fix a Leaking Faucet

A leaking faucet can waste a significant amount of water and increase your utility bills, so it’s important to address the issue promptly. The first step in fixing a leaking faucet is to locate and turn off the water supply valves under the sink. Typically, these valves are controlled by knobs or lever-like handles. Once turned off, drain any remaining water from the pipes to prevent further damage.
Next, disassemble the faucet by unscrewing the handle and spout. This may require a simple twist or the use of a wrench, depending on your faucet’s design. Inspect the parts for any damaged O-rings, cartridges, or washers, which are common causes of leaks. Replace these components with new ones that match your faucet’s model. Ensure all parts are properly aligned and reassemble the faucet, reattaching the handle and spout securely. Finally, turn on the water supply valves and test the repair by turning on the faucet to ensure it functions correctly without any leaks.
Troubleshooting Dripping Faucets

Dripping faucets can be a common household issue, often indicating a simple repair rather than a cause for alarm. Before calling a professional, there are several steps to take when troubleshooting this problem. Start by inspecting the faucet for any visible damage or loose parts. Check the O-rings and cartridges, as these are frequent culprits in leaking faucets. A slight tightening or replacement of these components might stop the drip.
If the issue persists, consider the water supply lines. Over time, these can corrode or develop leaks, causing water to drip continually. Inspect them for any signs of damage or moisture and replace if necessary. For complex issues, it might be best to consult a faucet repair specialist who can diagnose and fix problems related to aerators, pressure regulators, or even faulty plumbing connections.
How to Replace an Old or Damaged Faucet

If your faucet is old, damaged, or just doesn’t work properly anymore, it’s time for a replacement. The first step in replacing a faucet is to shut off the water supply. Most homes have two valves, one under the sink and another at the water line entering the house. Turn both valves clockwise to stop the flow of water. Once the water is shut off, you can begin disassembling the old faucet. This usually involves unscrewing the faucet handle and removing the aerator, which is the tip of the spout. Next, use a wrench or pliers to loosen and remove the supply lines connected to the underside of the faucet. After disassembly, carefully inspect all parts for damage or wear and identify the replacement parts you’ll need. Choose a new faucet that matches your preferred style, finish, and functionality, ensuring it’s compatible with your sink and water system.
With the right tools and some basic knowledge, replacing an old or damaged faucet is a manageable DIY project. Reassembling the new faucet involves installing the supply lines, securing the aerator, and tightening any loose connections. Remember to check for leaks after reassembly, as even small gaps can lead to significant water waste over time. Regular maintenance and timely repairs, including faucet repair, are essential to keeping your plumbing system in top condition.
When to Call a Plumber for Faucet Repairs

If you’re faced with a leaky faucet, it might be tempting to attempt a DIY repair to save time and money. However, there are certain situations where calling a professional plumber is the best course of action. For instance, if the leak persists despite your initial efforts or if the faucet issue is accompanied by low water pressure, it’s time to seek expert assistance. Plumbers have the necessary tools and expertise to diagnose complex problems that may not be immediately apparent to an untrained eye.
Additionally, some faucets, especially older models or those with intricate designs, require specialized knowledge and parts for repair. A plumber will possess the skills to handle these types of fixtures, ensuring a longer-lasting fix and preventing further damage. Remember, timely action is key when it comes to faucet repairs; leaving it unattended could lead to higher water bills and potential structural damage from excessive moisture.
Tips for Preventing Future Faucet Problems

Regular maintenance is key in preventing future faucet problems. Start by inspecting your faucets regularly for any signs of damage, leaks, or unusual noises. Cleaning the faucet’s aerator and strainer can also help maintain water pressure and prevent clogs. Removing these small components and wiping them down with a cloth or brush can clear out mineral buildup and debris.
Additionally, keeping an eye on the condition of your faucet’s O-rings and gaskets is essential. These parts wear out over time and are common sources of leaks. Replacing them promptly when needed can save you from more extensive faucet repair down the line. Always have spare parts on hand to make these quick fixes easily and efficiently.
Choosing the Right Faucet Repair Parts

When undertaking emergency faucet repairs, selecting the correct parts is paramount for a successful and lasting fix. The first step is to identify the specific type of faucet you have, as different models and brands use unique components. Check your faucet’s brand name and model number, which can usually be found on a plate or label at the base. This information will guide you in locating compatible repair parts.
Next, assess what needs replacement: is it the washer, O-ring, cartridge, or stem? Each part serves a distinct purpose in the faucet’s operation, so understanding their roles is crucial. For instance, washers and O-rings seal connections to prevent water leaks, while cartridges control the flow of water and temperature, and stems regulate the opening and closing of the valve. Choosing the right parts ensures your faucet repairs are efficient and effective, minimizing future disruptions.