Prompt and effective pipe repair is crucial to prevent bursts caused by temperature changes, especially during winters. Regular maintenance is essential to avoid sudden bursts due to rust buildup and scale accumulation in aging pipes. When a pipe bursts, a thorough assessment, use of right tools, and 10 straightforward steps are needed for repair. Isolating the water supply and calling a professional plumber are critical for safe repairs. Regular inspections, insulation, and maintenance can significantly reduce burst pipe risks.
A burst pipe can cause devastating damage to your home, but understanding the causes and taking preventive measures can save you from costly repairs. This comprehensive guide on pipe repair walks you through everything from identifying common issues that lead to bursts to the essential tools needed for a successful fix. We’ll break down the step-by-step process, offer tips for maintenance and safety, and highlight when professional help is crucial. Prepare to tackle leaks head-on!
Understanding Burst Pipe Causes
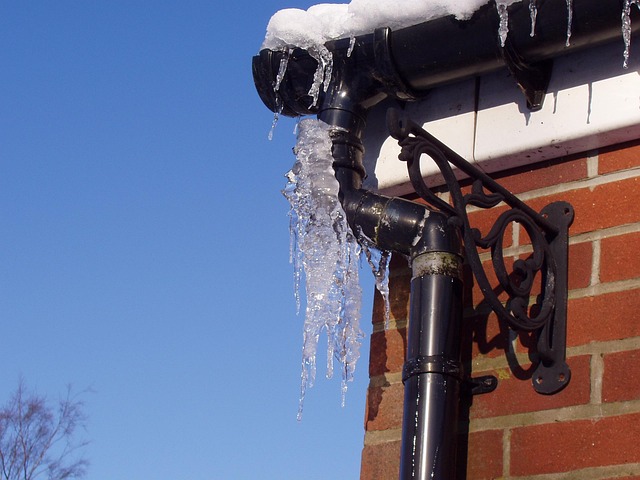
Pipe bursts can be caused by a variety of factors, making prompt and effective pipe repair crucial. One common cause is extreme temperature changes, especially during freezing winters. As water within pipes freezes, it expands, putting immense pressure on the pipe walls. Over time, this can lead to cracks or ruptures, resulting in a burst pipe. Insulating pipes against sudden temperature shifts can prevent such damage.
Another leading factor is aging pipes. As metal pipes corrode or weaken, their structural integrity diminishes, making them more susceptible to bursts. Lead, copper, and iron pipes, if not properly maintained, can suffer from rust buildup, scale accumulation, and eventual failure. Regular pipe repair and maintenance routines, including inspection and replacement of old or damaged pipes, are essential to avoid sudden burst pipe incidents.
Assessing the Damage
When dealing with a burst pipe, the first step in any effective pipe repair process is to assess the damage thoroughly. This involves inspecting both the visible and hidden sections of the affected piping system. Look for signs of water damage, such as mold or mildew growth, warped walls, or visible water stains on ceilings or floors above the pipe. Additionally, check for any unusual noises coming from the area, as this could indicate a ongoing leak that has yet to manifest as a burst pipe.
During your assessment, identify the type of pipe material and its condition before attempting any repair work. Different materials, such as copper, PVC, or steel, have varying vulnerabilities and require specific repair techniques. Furthermore, consider the location of the burst—is it near an accessible joint that can be easily repaired, or does it demand more intricate, potentially costly solutions? This initial evaluation will guide you in selecting the most efficient and cost-effective pipe repair method.
Essential Tools for Repair
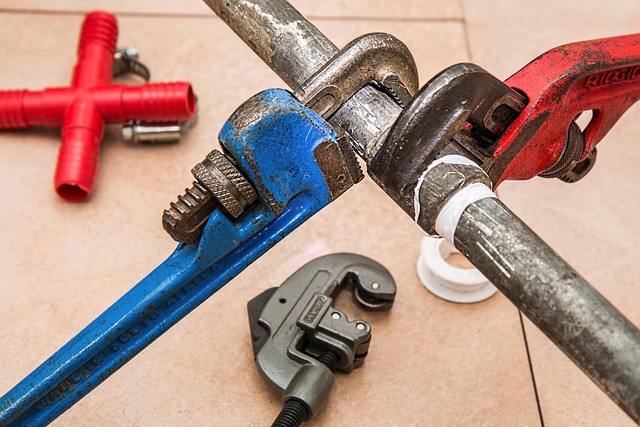
When it comes to burst pipe repair, having the right tools is crucial for a successful and efficient fix. The essential tools for this task include a variety of items that will help you assess, isolate, and repair the damaged section. Start with a leak detection solution, such as a dye or a pressure testing device, to pinpoint the exact location and extent of the burst.
Next, secure a set of pliers, both adjustable and needle-nose, for gripping and manipulating pipes and fittings. A pipe wrench is also indispensable for loosening and tightening connections. For cutting through damaged sections, invest in a high-quality pipe cutter, ensuring you have the right size to fit your specific pipe diameter. Additionally, gather various sizes of replacement joints, couplings, and clamps to facilitate repairs and ensure water tightness once the burst is fixed.
Step-by-Step Repair Process
When a pipe bursts, it’s crucial to act swiftly to prevent substantial water damage and other potential hazards. Here’s a step-by-step guide for repairing a burst pipe:
1. Isolate the Water Supply: The first step is to turn off the main water supply valve to stop the flow of water. This can typically be done by locating and closing the shut-off valve under the sink or in your home’s utility room.
2. Locate and Assess the Burst Pipe: Once the water is shut off, inspect the pipe to understand the extent of the damage. Identify where the burst has occurred, whether it’s near a joint, a fitting, or due to a burst in the middle of the pipe. This knowledge will guide your repair approach.
3. Turn Off Excess Water: If residual water continues to flow from nearby fixtures, shut them off at their individual valves to prevent further waste.
4. Remove the Burst Section: Using wrenches and pliers, carefully remove the damaged section of the pipe. Ensure you have a tight grip to avoid any more leaks during the removal process.
5. Clean the Area: Remove any debris or remnants of the burst pipe from around the exposed area. A clean workspace ensures a more effective repair job.
6. Cut New Pipe to Size: Measure and cut a new section of pipe that matches the length of the damaged section, using a pipe cutter for precision.
7. Prepare Pipes for Connection: Remove any protective coating or debris from the ends of both the old and new pipes. This ensures a clean connection.
8. Connect the Pipes: Use appropriate pipe fittings to join the old and new pipes securely. This can involve threading, soldering, or using specialized pipe connectors, depending on your pipe material and existing setup.
9. Turn On the Water Supply: After confirming that all connections are secure, carefully open the main water supply valve. Check for leaks at each connection point.
10. Test the Repair: Run hot and cold water through the fixture connected to the repaired pipe to ensure there are no leaks or flow issues.
Preventing Future Burst Pipes
To prevent future burst pipes, regular maintenance is key. Start by inspecting your plumbing system annually to identify any signs of damage, corrosion, or leaks. Addressing these issues promptly can save you from costly repairs and further damage. Insulating pipes in colder regions is another effective strategy; this prevents water inside from freezing and expanding, which can lead to bursts.
Additionally, consider using thermal insulation on exposed pipes and checking for air leaks in your plumbing system. Regularly flushing hot water heaters and maintaining them at the recommended temperature can also reduce stress on pipes. Keep an eye out for high water pressure, as it can cause pipe damage over time; installing a pressure regulator may be necessary. Lastly, use only licensed plumbers for pipe repair to ensure work is done correctly, minimizing future risks.
Common Mistakes to Avoid
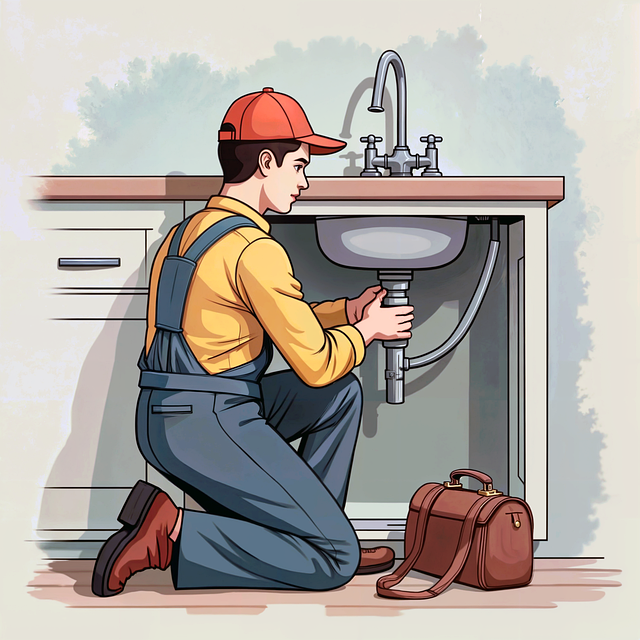
When it comes to burst pipe repair, there are several common mistakes homeowners often make that can lead to further damage and costly repairs. One of the biggest blunders is attempting to fix the issue yourself if you’re not experienced in plumbing. DIY methods can be risky, especially with a burst pipe, as incorrect handling might cause more harm. It’s always best to call a professional plumber for prompt and safe repair.
Another mistake to avoid is neglecting to locate and turn off the main water supply valve once you’ve identified the burst pipe. Without shutting off the water, any repair work will be temporary, and you risk flooding your home. Always remember: isolate the water source first before beginning any pipe repair to ensure a successful and long-lasting fix.
When to Call a Professional Plumber

If you notice signs of a burst pipe, such as water leaks, loud banging or vibrating sounds, or low water pressure, it’s crucial to act quickly. While some minor pipe repairs can be tackled yourself, more complex issues often require professional expertise. Calling a plumber is essential when dealing with severe pipe damage, frozen pipes that have burst, or if the leak has caused significant water damage to your property.
Professional plumbers are equipped with specialized tools and knowledge to assess and fix pipe repairs efficiently. They can identify the root cause of the burst pipe, whether it’s due to aging pipes, corrosion, or structural issues, and provide long-lasting solutions. Prompt professional intervention can prevent further damage, minimize water waste, and ensure your home remains safe and secure during the repair process.
Maintenance Tips for Plumbing Safety
Regular maintenance is key to ensuring plumbing safety and preventing burst pipes, a common yet costly issue. Here are some essential tips to keep your plumbing system in top condition. Firstly, inspect your pipes for any signs of damage, corrosion, or leaks, especially in areas prone to freezing during winter. Regular checks can help identify issues early on, making pipe repair more manageable.
Additionally, insulate pipes that are vulnerable to temperature changes, and consider using thermal insulation to prevent sudden freezing. Keep an eye on water pressure levels; consistent monitoring can alert you to potential problems. Lastly, schedule professional plumbing inspections annually to assess the overall health of your system, ensuring any red flags are addressed promptly, thereby reducing the risk of costly pipe repairs.