
Grout line stains require understanding causes like water damage, mold, or dirty cleaners for effective removal. Identify surface or penetrating stains and gather tools like a grout brush, all-purpose cleaner, and protective gloves. Follow a six-step process to clean grout: test solutions, apply, soak, scrub, rinse, and dry. Natural home remedies use vinegar and baking soda. For stubborn stains, professional restoration services restore grout lines. Regular cleaning, vacuuming, sealing, and inspections prevent future stains.
Tired of unsightly grout line stains? This comprehensive guide unveils effective solutions for removing even the most persistent marks. From understanding the causes and types of grout stains to exploring natural home remedies, essential tools, and maintenance tips, we’ve got you covered. Learn professional cleaning techniques and when to seek expert help for a flawless grout restoration. Discover how to prevent future staining and restore your grout lines’ original gleam.
Understanding Grout Line Stains: Causes and Types
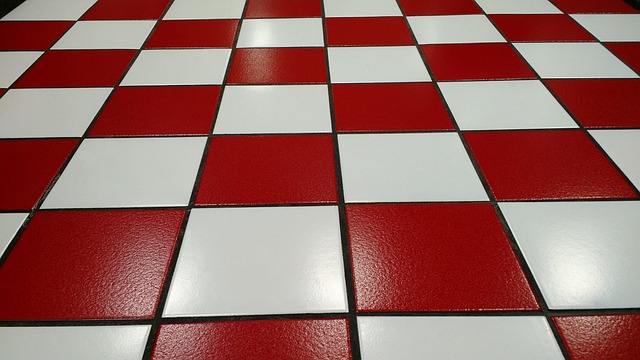
Grout line stains can be a common and frustrating issue for homeowners, but understanding their causes is the first step in learning how to effectively remove them. These unsightly marks often appear as discolored spots or lines on your grout, ranging from light yellow and gray to deep brown and black. Various factors contribute to grout line staining, including water damage, mold and mildew buildup, dirt and grime accumulation, and even certain types of cleaning products.
There are primarily two types of stains that affect grout lines: surface stains and penetrating stains. Surface stains, such as those caused by spills or tracked-in dirt, can usually be removed with proper cleaning techniques. Penetrating stains, on the other hand, have worked their way deeper into the grout material and may require more aggressive methods to effectively remove them. Identifying the type of stain will help determine the best approach for removing stains from grout lines.
Essential Tools and Materials for Stain Removal

When tackling stain removal on grout lines, having the right tools and materials is half the battle won. To effectively remove stains from grout lines, gather a few essential items. Start with a good quality grout brush, designed to reach tight spaces and scrub away dirt and grime. This tool will help you apply cleaning solutions precisely and agitate the stained area without causing damage. Next, consider an all-purpose cleaner or a grout-specific cleaning agent. Look for products that are safe on tile and grout and effective against various stains. Don’t forget to wear protective gear, such as gloves, to safeguard your hands during the cleaning process.
Additionally, a soft cloth or sponge will come in handy for wiping away excess cleaner and drying the surface. You might also want to invest in a grout pen or marker, which can be used to apply targeted cleaning solutions directly onto stubborn stains. These tools make stain removal more efficient and precise, ensuring that only the stained areas are treated while keeping the surrounding grout line intact.
Step-by-Step Guide: Effective Cleaning Techniques

Removing stains from grout lines can be a straightforward process if you know the right techniques. Here’s a step-by-step guide to help you achieve clean and fresh-looking grout:
1. Identify and Test Cleaning Solutions: Start by identifying the type of stain. Different stains may require different cleaning agents. Test a small, inconspicuous area with any chosen solution to ensure it won’t cause discoloration or damage to the grout.
2. Prepare Your Cleaning Solution: Mix a cleaning solution using warm water and a mild detergent or a specialized grout cleaner. For tougher stains, consider adding a few drops of bleach or an oxygen-based stain remover. The key is to create a mixture that’s effective yet safe for your grout material.
3. Apply the Solution: Use a soft-bristled brush or a sponge to apply the cleaning solution directly to the stained grout lines. Ensure even coverage and gently scrub the area in circular motions, taking care not to scrape off the grout.
4. Let it Soak: Allow the solution to soak into the grout for about 10-15 minutes. This step helps to soften and break down the stain, making it easier to remove.
5. Scrub and Rinse: After soaking, scrub the area thoroughly using a clean brush or sponge. Then, rinse with warm water, ensuring all cleaning solution is removed.
6. Dry and Inspect: Finally, dry the grout lines completely with a clean towel or cloth. Inspect the area to ensure the stain has been effectively removed.
Natural Home Remedies for Persistent Stains

When it comes to removing stubborn stains from grout lines, turning to natural home remedies can be an effective and cost-saving alternative. Vinegar, for instance, is a popular choice due to its acidity, which helps to break down and dissolve mineral deposits and dirt that have accumulated over time. Simply mix equal parts vinegar and water in a spray bottle, apply the solution directly to the stained grout line, and let it sit for about 15-20 minutes before scrubbing gently with a soft brush or cloth.
Another natural cleaner that has gained popularity is baking soda. Its abrasive nature makes it ideal for scuffing away surface stains while also being gentle enough not to damage the grout. Create a paste by mixing baking soda with water, apply it to the stained area, and let it sit for several minutes. After the paste has had time to work its magic, use a damp cloth or sponge to wipe away the residue and revel in your stain-free grout lines.
When to Seek Professional Help for Grout Restoration

If stains have set in and become particularly stubborn, it might be time to consider professional grout restoration services. While DIY methods can help with minor issues, heavy staining or extensive damage often requires the expertise of a specialist. Grout cleaning professionals have access to powerful yet safe chemicals and advanced tools designed for deep cleaning and stain removal. They understand the different types of grout and tiles, enabling them to tailor their approach for optimal results.
Additionally, if your grout lines are not just stained but also show signs of disintegration or there’s an uneven surface, professional help is recommended. Prompt action can prevent further deterioration and costly repairs down the line. A skilled restorer will not only remove existing stains but also ensure the grout lines are sealed properly to resist future staining, making your space look as good as new.
Maintenance Tips to Prevent Future Staining

Regular cleaning and maintenance are key to preventing grout line staining. Sweeping or vacuuming floors after each use helps remove loose dirt and debris that can lead to discolouration. For deeper cleaning, a mild detergent and warm water solution is effective for removing stubborn stains from grout lines.
Additionally, sealing the grout every 6-12 months with a high-quality sealer can create a protective barrier, preventing liquids from penetrating and causing stains. Regular inspection of grout lines will also help identify potential issues early on, making it easier to remove any staining before it becomes permanent.