
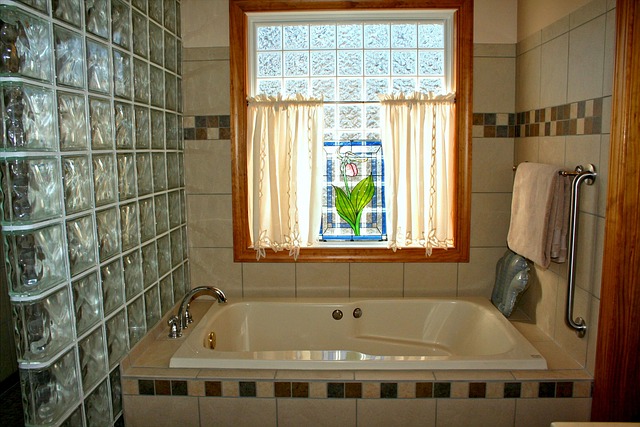
Restoring old tile and grout involves addressing damage from efflorescence, discolouration, and moisture intrusion, often caused by improper installation or wear and tear. The process begins with assessing damage severity, cleaning, and preparing the surface. This includes using specialized tools to remove deteriorated grout and protecting surrounding areas. Selecting the right cleaning solutions (acid-based for buildup, neutral pH for delicate tiles) and sealers (silicone-based for high moisture) is crucial. After deep cleaning and repairing damaged areas, mix a grout repair compound, re-grouting according to manufacturer instructions, and applying a sealer for lasting results. Following proper maintenance practices after restoration is vital for longevity.
Looking to revive your tired, stained tile and grout? This comprehensive guide provides a step-by-step plan for successfully restoring your old tile and grout. We’ll delve into understanding common grout damage, evaluating your existing tiles, gathering the right tools, and choosing the best restoration products. By following these expert tips, you’ll achieve long-lasting results that will make your space look brand new again. Say goodbye to stained grout and hello to a sparkling, rejuvenated home!
Understanding Grout Damage and Its Causes

Grout damage is a common issue that can occur in any tiled space, be it your bathroom, kitchen, or even commercial floors. Understanding the causes behind this problem is key to effective restoration. Over time, grout can suffer from several types of deterioration, including efflorescence (a white or grey powdery deposit), discolouration due to dirt and stains, and structural damage from moisture intrusion.
These issues often arise from various factors like improper installation, inadequate sealing, exposure to harsh chemicals, and regular wear and tear. How to restore old tile and grout? The first step is to assess the extent of the damage. Light scuffing and staining can be treated with specialised cleaning solutions, while more severe cases may require removal and re-grouting.
Evaluating the Condition of Your Old Tile and Grout

Preparing for Grout Restoration: What You Need

Preparing for grout restoration is a crucial step in how to restore old tile and grout. It involves assessing the entire area, identifying damaged or discolored grout, and gathering necessary tools and materials. Start by vacuuming the floor to remove any loose debris or dirt. Then, use a wire brush or grout saw to scrape away deteriorated grout, taking care not to damage the tiles. Next, clean the tiles and grout thoroughly with a mild detergent and a sponge or cloth. This ensures that the new grout adheres properly.
Once the area is ready, create a restoration mixture according to the manufacturer’s instructions. Typically, this involves mixing a grout repair compound with water. You’ll also need a putty knife for applying the grout, a trowel for spreading it evenly, and plastic sheeting or drop cloths to protect surrounding areas from stains or damage. Proper preparation is key in achieving long-lasting results when restoring old tile and grout.
The Grout Restoration Process: Step-by-Step Guide
Restoring old tile and grout is a process that involves several meticulous steps, ensuring your workspace regains its original beauty. Here’s a step-by-step guide on how to achieve this:
1. Preparation: Begin by clearing the floor of any debris and furniture. Protect surrounding areas with drop cloths to prevent damage from tools or chemicals. Put on safety gear, including gloves and a mask, especially if you’re tackling moldy or mildewed grout.
2. Removal: The next step is to remove the old grout. This can be done using a grout saw or chisel, depending on the condition of the grout lines. Take your time to avoid damaging the tiles. Once the grout is removed, clean the area thoroughly with a brush and water solution to eliminate any remaining debris or grime.
Choosing the Right Grout Restoration Products

When undertaking grout restoration, selecting the appropriate products is a critical step in the process. The market offers a wide array of options tailored for different tile types and grout conditions. For instance, acid-based etch cleaners are effective for removing buildup and discolored grout, while neutral pH cleaning solutions are gentler and suitable for delicate or natural stone tiles.
Choosing the right sealer is also essential to prevent future discoloration. Silicone-based sealers provide excellent water resistance, making them ideal for high-moisture areas like kitchens and bathrooms. Additionally, considering the use of colorant during restoration can help match or enhance the original grout color, ensuring a seamless finish when restoring old tile and grout.
Tips for Achieving Long-Lasting Results

When attempting to restore old tile and grout, achieving long-lasting results requires a thoughtful approach. Begin by thoroughly cleaning the existing grout, removing any loose debris or stains with a mixture of warm water and mild detergent. This initial step is crucial for preparing the surface and ensuring better adhesion during the restoration process.
After cleaning, assess the condition of both the tiles and grout. If there are significant cracks or damaged areas, repair or replace them to maintain structural integrity. Use high-quality grout suitable for your tile type, following manufacturer instructions for proper installation. Regular maintenance, such as sealing the grout every few years, can also extend the lifespan of the restoration work.
Common Mistakes to Avoid During Grout Restoration
When tackling grout restoration, especially for old tile and grout, it’s essential to be aware of common pitfalls that can compromise the outcome. One major mistake is attempting a DIY project without proper preparation and knowledge. Grout restoration requires specialized tools and techniques, so seeking professional guidance or using online tutorials as a reference is crucial. Using the wrong cleaning solutions or excessive water can damage the tiles and make the grout look worse.
Another error to avoid is neglecting the initial inspection. Before restoring, examine the tiles and grout carefully to identify any structural issues, loose tiles, or severe discoloration. Neglecting this step may lead to poor bonding of new grout, resulting in an uneven finish. Additionally, not testing cleaning agents in a small, inconspicuous area first can cause irreversible damage to the tile surface. Always follow manufacturer instructions and consider using protective gear during the restoration process for safety.
Maintaining Your Restored Grout and Tiles

Maintaining your restored grout and tiles is crucial for prolonging their beauty and longevity, especially after a thorough restoration process involving old tile and grout. Regular cleaning is key; use a mild detergent and a soft-bristled brush to gently scrub any dirt or stains. Avoid harsh chemicals that could damage the freshly restored surface. It’s recommended to seal your grout after cleaning to protect it from moisture and staining, ensuring your tiles stay in pristine condition for years to come.
Additionally, keeping an eye out for signs of wear and tear is essential. Repairs should be addressed promptly to prevent further damage. Regular inspection will help you notice any loose or damaged grout, allowing for quick action. By following these simple maintenance tips, you can ensure your restored tiles and grout remain in top condition, enhancing the overall aesthetic of your space.