
Concrete cracks are a common problem caused by various factors like structural issues, thermal changes, and environmental conditions. Identifying crack types is crucial for choosing the right repair method: sealing, patching, underpinning, or replacing sections. The right patching material, such as asphalt for small cracks, epoxy for deeper ones, or polymer compounds for balanced solutions, ensures long-lasting repairs. Avoid common mistakes like inadequate surface preparation and incorrect material selection. Preventive measures include regular inspections, proper drainage, and applying sealers to protect against moisture. For extensive cracks, professional services are recommended to address structural issues comprehensively.
Concrete cracks can range from cosmetic issues to structural problems. This article guides you through the process of concrete crack repair, starting with understanding common causes and types of cracks. We’ll cover preparing the crack area, choosing the right patching material, application techniques, common mistakes to avoid, maintenance tips, and when to call a professional for complex repairs. Learn how to effectively address these unsightly defects and preserve your concrete’s integrity.
Understanding Concrete Cracks: Common Causes and Types
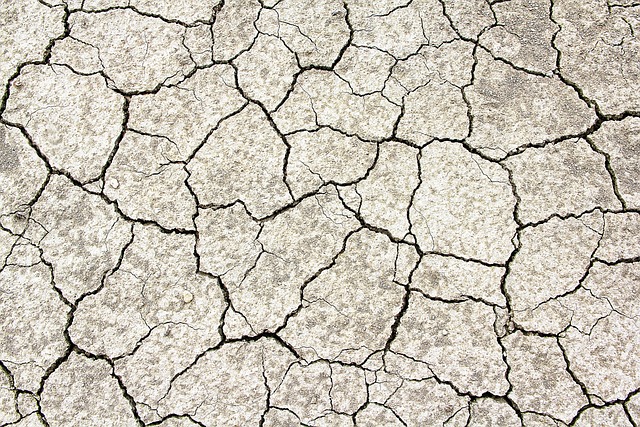
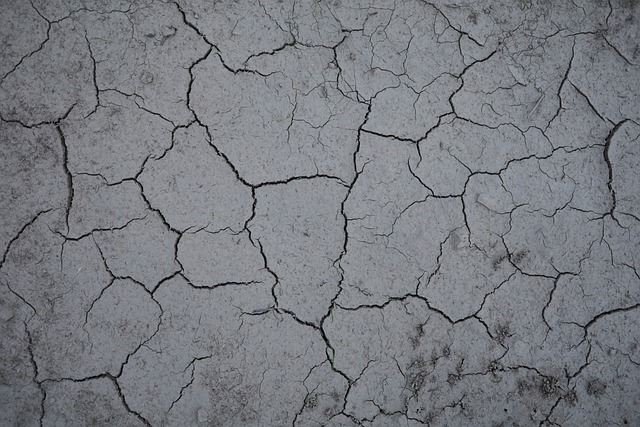
Concrete cracks are a common problem that can appear for various reasons. Understanding these causes is crucial for effective crack repair. Some of the most frequent types include structural cracks, caused by improper concrete mixing or settlement due to shifting soil conditions; surface cracks, often resulting from thermal expansion and contraction; and hairline cracks, typically occurring because of drying shrinkage. Environmental factors such as freeze-thaw cycles, excessive moisture, and extreme temperatures can also contribute to crack development.
Recognizing the specific type of crack is essential for selecting the appropriate repair method. Surface cracks can usually be addressed with simple sealing or patching techniques, while structural cracks might require more intensive solutions like underpinning or replacing affected sections. Regular maintenance and inspection are key to mitigating concrete cracking issues before they escalate.
Preparation: Cleaning and Repairing the Crack Area

Before tackling any crack repair project, proper preparation is key. The first step involves cleaning the area around the crack thoroughly. This removes any loose debris, dirt, or dust that might hinder the bonding process of the repair material. A pressure washer can be used for this purpose, ensuring that the surface is free from contaminants. Once cleaned, inspect the crack closely to assess its depth and width. If there are any visible signs of structural damage or weakness, it’s crucial to address these issues before proceeding with patching. Repairing the crack area might involve chiseling out any weakened concrete and ensuring the edges are clean and even for optimal adhesion of the repair compound.
Choosing the Right Patching Material: Asphalt, Epoxy, or Polymer

When repairing cracks in concrete, choosing the right patching material is essential for effective and long-lasting results. Asphalt, epoxy, and polymer are three commonly used options each with its own unique advantages.
Asphalt is a cost-effective choice known for its ease of application and good adhesion to concrete. It is suitable for small to medium-sized cracks and offers quick repair times. Epoxy, on the other hand, provides superior strength and durability, making it ideal for deeper or wider cracks that require structural support. Polymer-based patching compounds offer a balance between asphalt and epoxy, providing good flexibility and resistance to environmental factors like UV exposure and freezing temperatures.
Application Techniques: Steps for Effective Crack Filling

To effectively crack repair using concrete patching techniques, follow these steps:
1. Prepare the Surface: Clean the cracked area thoroughly to remove any loose debris, dust, or oil. This ensures better adhesion for the crack filler. Use a pressure washer if necessary, followed by a brush to scrub away contaminants.
2. Assess and Measure: Inspect the crack to determine its depth and width. For wider cracks, it might be best to use a flexible joint sealer before filling. Make sure the temperature conditions are suitable for application, as most crack fillers have optimal working temperatures.
3. Apply Crack Filler: Use a putty knife or trowel to apply the chosen crack filler material. Start at one end of the crack and work your way through, ensuring complete coverage. For larger cracks, consider using a specific concrete patching compound designed to fill deep fissures.
4. Smooth and Level: After filling, use the tool used for application to smooth the surface of the filler, making it level with surrounding concrete. This step is crucial to prevent water pooling or uneven surfaces that could lead to future damage.
5. Allow to Cure: Give the crack filler adequate time to cure according to the manufacturer’s instructions. Most products require several days to fully harden and achieve maximum strength.
Common Mistakes to Avoid During Concrete Patching
When conducting concrete patching and crack repair, there are several common mistakes that should be avoided. One of the most frequent errors is failing to properly prepare the surface before applying the patch. This includes not cleaning the area thoroughly or removing loose debris, which can weaken the integrity of the repair. Using the incorrect type of patching material for the specific crack size or location is another mistake; always match the product to the task at hand.
Overlooking cracks that are too wide or deep is a critical error, as these may indicate more severe structural issues. Additionally, not allowing enough time for the concrete patch to cure fully can lead to weak repairs. The surface must be left undisturbed during this process to ensure optimal bonding between the old and new concrete. Lastly, neglecting to seal the repaired area appropriately can result in water penetration and further damage down the line.
Maintenance and Prevention: Keeping Cracks at Bay

Regular maintenance and preventive measures are key to keeping concrete cracks at bay.
A proactive approach starts with understanding the causes of cracking, which can stem from various factors like movement, settlement, freeze-thaw cycles, or poor initial construction. By addressing these root issues, you can significantly delay the onset of new cracks. This includes proper drainage systems to prevent water pooling and subsequent freezing, ensuring adequate concrete thickness for expected loads, and implementing regular inspection routines to catch minor flaws early on.
Additionally, applying sealers or coatings to the surface can provide an extra layer of protection against moisture penetration, thus slowing down the deterioration process that often leads to cracking.
When to Call a Professional: Complex Crack Repair
When cracks start appearing on your concrete surfaces, ignoring them isn’t always the best course of action. While minor cracks can often be repaired DIY-style, more complex crack repair jobs may require professional intervention.
If you’re dealing with large or deep cracks, cracks that extend across wide areas, or cracks causing structural instability, it’s time to call in the experts. Professionals have access to specialized equipment and materials designed for robust repairs, ensuring long-lasting results. They can also identify underlying issues, like poor drainage or settlement, that might be contributing to crack formation, offering comprehensive solutions to prevent future damage.