
Grout stains can significantly impair the aesthetics of tiled surfaces, requiring understanding their causes (dirt, oil, moisture) and categories (water-based, oil-based, mineral deposits) for effective removal. Key steps include pre-treatment with vacuuming, brushing, and specialized grout cleaners; selecting appropriate cleaning agents (mild detergent, vinegar, baking soda); deep cleaning with steam or chemical cleaners; and post-cleaning sealing with high-quality grout sealers. Regular maintenance, including prompt spill cleanup and commercial-grade grout cleaners, helps prevent future staining and preserves flooring aesthetics.
Grout, often taken for granted, can significantly impact the overall look of your tiles. Over time, grout lines can become discolored and stained, making spaces appear unkempt. This article guides you through a comprehensive freshening process for professional results. We’ll explore common grout stain causes, pre-treatment steps to prepare your grout, effective cleaning solutions, deep cleaning methods, sealing techniques, and maintenance tips to prevent future staining. Learn how to remove stains from grout lines and restore your space’s pristine appeal.
Understanding Grout Stains: Causes and Types
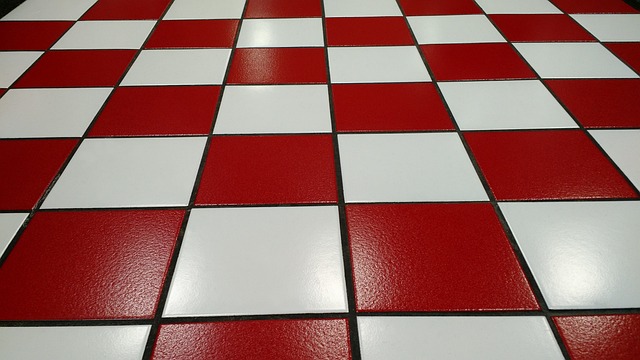
Grout stains can significantly detract from the appearance of tiled surfaces, making it essential to understand their causes and types before attempting any removal. These stains often emerge due to various factors such as dirt, oil, and moisture seeping into the grout lines. Over time, these substances can break down the grout’s integrity, leading to discolouration. Different types of stains include water-based stains caused by spills or humidity, oil-based stains from greasy substances, and mineral deposits left behind by hard water.
Each type of stain requires a specific approach for effective removal. For example, water-based stains can often be treated with mild cleaning solutions, while oil-based stains may necessitate the use of more robust degreasers. Understanding the nature of the stain is crucial in selecting the right tools and techniques to remove stains from grout lines efficiently.
Pre-Treatment: Preparing the Grout for Freshening

Before you begin the grout freshening process, proper preparation is key to achieving optimal results. The first step in this process is pre-treatment, which involves thoroughly cleaning and preparing the grout lines to remove any existing stains or buildup. Start by vacuuming the floors to eliminate loose debris and dirt. Then, use a brush or a specialized grout cleaner to agitate and dislodge stubborn stains from within the grout. This manual scrubbing helps to break down and lift away grime, ensuring that your freshening treatment is effective.
Once the grout lines are clean, rinse them well with warm water to wash away any cleaning agents or residue. Allow the grout to dry completely before proceeding to the next stage of the freshening process. Proper pre-treatment ensures that your grout looks refreshed and revitalized, enhancing the overall aesthetics of your space.
Effective Cleaning Solutions and Techniques

When it comes to professional grout freshening, effective cleaning solutions and techniques are paramount. The primary goal is to remove stains from grout lines, which can be achieved through a combination of specialized products and meticulous methods. Start by identifying the type of stain—whether it’s caused by mold, mildew, or general dirt and grime—and select a cleaning agent tailored to its removal. Many professional cleaners opt for eco-friendly, non-toxic solutions that are safe for both grout and surrounding surfaces.
For everyday maintenance, a mixture of warm water and mild detergent often does the trick. Using an old toothbrush or grout brush, apply the solution directly to the stained areas, gently scrubbing to dislodge any built-up residue. For more stubborn stains, consider using vinegar or baking soda paste. Always test cleaning agents in a small, inconspicuous area first to ensure they won’t cause discoloration or damage. Regular, thorough cleaning prevents future staining and keeps grout lines looking fresh and crisp.
Deep Cleaning Methods for Stained Grout Lines

Deep cleaning is often a necessary step in grout freshening, especially if your grout lines have accumulated stains over time. The first method to consider when aiming to remove stains from grout lines is steam cleaning. This process involves using high-pressure steam to penetrate and loosen stubborn dirt, grime, and even mold. Steam cleaning is highly effective for deep cleaning as it kills bacteria and molds while softening and relaxing the grout, making it easier to scrub away stains.
For more severe cases, chemical cleaners can be employed. These powerful agents are designed to dissolve and remove mineral deposits, calcium buildup, and other types of stains that have set in over time. When using chemical cleaners, always follow safety instructions, wear protective gear, and ensure proper ventilation to avoid any adverse effects. After applying the chemical cleaner, scrub thoroughly with a stiff-bristled brush or grout tool to lift away the stains. Rinse well to remove any residual chemicals, and dry completely before sealing or re-grouting.
Sealing and Protecting Your Grout After Freshening

After freshening your grout, sealing it is a crucial step to protect its new appearance and prolong its longevity. Apply a high-quality grout sealer to all the grout lines, especially in areas prone to staining, such as near sinks, showers, or kitchens. This will create an impenetrable barrier, preventing dirt, moisture, and stains from settling into the tiny crevices.
By sealing your grout, you’ll not only maintain its aesthetic appeal but also save yourself time and effort in future cleaning routines. Regularly wiping down sealed grout with a soft cloth will keep it looking fresh, ensuring that any spills or stains are easily removable without causing damage to the grout’s protective layer.
Maintenance Tips to Prevent Future Staining

Regular cleaning and maintenance are essential to prevent grout staining, ensuring your floors remain vibrant and pristine. A simple yet effective strategy is to promptly address any spills or dirt tracks. The moment you notice a spill, use a soft cloth or sponge to absorb excess liquid, preventing it from settling into the grout lines. For tougher stains, invest in commercial-grade grout cleaners that effectively remove grime without damaging the grout. These products contain enzymes that break down organic compounds, making them ideal for tackling stubborn marks.
In addition to cleaning, sealing your grout is a game-changer. Applying a high-quality grout sealer creates a protective barrier, repelling liquids and preventing stains from setting in. This simple step can save you time and effort in the long run, as it reduces the frequency of deep cleaning required. Remember, consistent care will keep your grout looking fresh, extending its lifespan and maintaining the overall aesthetics of your flooring.