
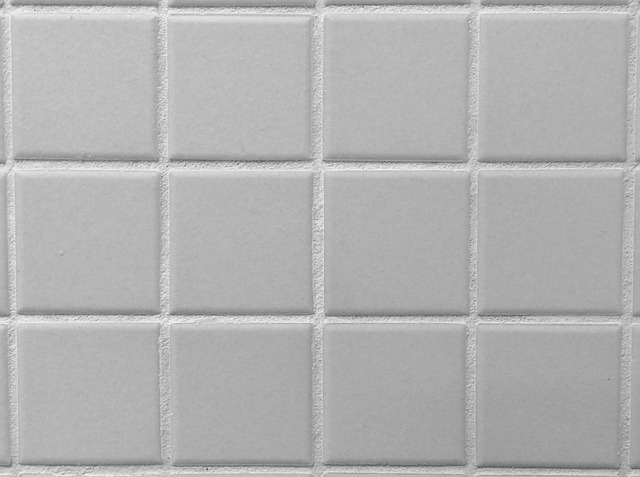
Exposure to elements and wear over time can damage tiles and grout, affecting aesthetics, functionality, and hygiene. Regular maintenance and proper preparation are key to restoring old tile and grout. First, assess the damage (stains, cracks, loose tiles, peeling grout). Then, gather tools and materials, protect yourself and your space, and organize your workspace. Identify the issue (mold, general grime) and choose a cleaner; test in a hidden spot first. For minor damages, DIY kits can match existing grout color; for extensive damage, professional help is needed. Re-grouting involves removing old grout, cleaning, applying new grout, and sealing to protect against moisture and stains. Regular cleaning and sealing every 1-2 years extend tile lifespan and prevent future restoration needs.
Tile and grout are integral parts of any home, but over time, they can show signs of aging. This guide explores the art of professional grout and tile care, focusing on restoration techniques for old tiles. We’ll delve into understanding tile aging, assessing its condition, and preparing for renovation. Learn effective cleaning methods to eliminate stains and mold, and discover repair and regrouting strategies. Additionally, maintenance tips will ensure longevity, making future restorations seamless. Discover how to restore your old tile and grout, enhancing your home’s aesthetics and value.
Understanding Tile and Grout Aging: Causes and Effects
Over time, tiles and grout can show signs of aging, becoming discolored, stained, or even damaged. This process is primarily due to several factors such as exposure to water, dirt, and various chemicals, as well as foot traffic and general wear and tear. Understanding these causes is the first step in knowing how to restore old tile and grout effectively.
The effects of aging can vary; grout might develop cracks or become loose, while tiles may lose their initial gloss and start to fade. These changes not only impact the aesthetic appeal but also affect the overall functionality and hygiene of the tiled surface. Regular maintenance and cleaning are crucial in delaying these issues, but for older tiles and grout, professional restoration techniques can be employed to revive their former glory.
Assess the Condition of Your Old Tiles and Grout

Before diving into any restoration project, assessing the condition of your old tiles and grout is a crucial first step. How to restore old tile and grout depends heavily on its current state. Look for signs of damage, discolouration, or peeling grout. Cracked or loose tiles might require replacement, while stained grout can often be revitalised with appropriate cleaning solutions. Regular wear and tear can make tiles appear dull or lose their original gloss; this can usually be addressed through polishing or sealing.
During your assessment, consider the material of both your tiles and grout. Different materials need distinct care routines. Porcelain and ceramic tiles, for instance, may require a different approach than natural stone varieties. Knowing how to best restore old tile and grout ensures that your efforts are tailored to the specific needs of your flooring, prolonging its lifespan and preserving its aesthetic appeal.
Preparation: Gather Tools and Materials for Restoration

Before starting any restoration project, preparation is key. Gather all the necessary tools and materials for restoring your old tile and grout. This may include a wire brush or floor scrubber, grout saw or utility knife, vacuum cleaner, tile cleaning solution, grout sealer, and new grout if needed. Ensure you have adequate protection for your floors and wear gloves to avoid skin irritation.
Organize your workspace efficiently to make the process smoother. Clear any debris from the area and cover adjacent surfaces with drop cloths or plastic sheets. Prepare your cleaning solution according to the manufacturer’s instructions, ensuring it’s suitable for both tile and grout. Having everything ready beforehand will help you restore your old tile and grout effectively and with minimal fuss.
Cleaning: Steps to Effectively Remove Dirt, Stains, and Mold

To effectively clean and restore old tile and grout, start by identifying the specific stain or mold issue. Different stains require different approaches. For example, use a mixture of baking soda and vinegar for general grime, or a commercial tile cleaner for tough, ingrained dirt. Always test any cleaning solution in an inconspicuous area first to ensure it won’t damage or discolor your tiles or grout.
Once you’ve chosen the right cleaner, apply it liberally to the affected areas. Use a sponge or soft-bristled brush to gently scrub away stains and mold. For stubborn cases, consider using a grout brush designed for deep cleaning. Rinse thoroughly with warm water after scrubbing, ensuring all residue is removed. Drying the tiles and grout completely afterward will help prevent future mold growth.
Repairing and Replacing Damaged Areas

Repairing and replacing damaged areas is a crucial step in maintaining your grout and tile’s longevity. How to restore old tile and grout involves assessing the extent of the damage. Small chips or cracks can often be repaired with simple DIY kits, allowing you to match the existing grout color for a seamless look. For more extensive damage, such as large gaps or broken tiles, professional intervention is recommended.
When repairing, it’s essential to remove any loose debris and prepare the surface. This process ensures a clean slate for new grout installation. Replacing tiles might require matching the existing style and color, especially in high-traffic areas like kitchens and bathrooms, to maintain an aesthetically pleasing and functional space.
Re-grouting: Techniques and Best Practices

Re-grouting is an essential technique for restoring old tile and grout to their former glory. It involves removing the existing grout, cleaning the tiles and grout lines thoroughly, then applying new grout to fill in the gaps. One popular method is to use a grout removal tool to scrape away the old grout, followed by a pressure washer or strong cleaner to eliminate any remaining residue. For a more meticulous approach, a grout saw can be utilized to cut out old grout in tight spaces.
Once the area is prepared, it’s time to apply new grout. Ensure you choose a grout that matches the original color and texture for a seamless finish. Use a grout float or trowel to spread the grout evenly into the tile grooves. Gently tap the trowel along the length of each groove to remove any excess grout. Allow the grout to cure completely before sealing it with a suitable sealer to protect against moisture and stains, extending the lifespan of your freshly regrouted tiles.
Maintenance Tips for Longevity and Future Restoration
Regular maintenance is key to extending the life of your tile and grout, ensuring they remain in top condition for years to come. A simple cleaning routine can go a long way in preventing damage and future restoration needs. Use a mild detergent or natural cleaner and warm water to regularly wipe down surfaces, removing any dirt or stains. Avoid harsh chemicals which can erode the grout and damage the tile finish.
To keep your tiles looking fresh, seal them every 1-2 years with a high-quality sealer. This protective layer will prevent water absorption, making it easier to clean and reducing the risk of staining. If you notice any discolored or damaged grout, don’t wait. Addressing issues early on is crucial for cost-effective restoration. How to restore old tile and grout involves modest tools and materials—a brush, vacuum, mild acid (for tough stains), and new grout sealer—and can refresh your space without extensive work.