
Tile restoration involves a multi-step process starting with a thorough inspection to assess damage and choose appropriate techniques. This is followed by cleaning to eliminate dirt and stains, grouts sealing or restoring for protection, and repairing or replacing damaged tiles. Grout replacement addresses discoloration and ensures water tightness. Applying a sealant protects against moisture and stains. Maintaining regular cleaning, proper ventilation, and seasonal sealing prolongs the life of restored tiles.
Discover the art of revitalizing your space with full-service tile restoration—a comprehensive guide to breathing new life into aged tiles and grout. Learn how this process, encompassing assessment, cleaning, repair, and protection, can transform dull, stained surfaces into vibrant, functional areas. This step-by-step approach, including tips on grout replacement and sealant application, ensures your old tiles not only look their best but also remain that way for years to come. Uncover the secrets to successfully restoring your tile with our expert insights on avoiding common mistakes and maintaining longevity.
Understanding Full-Service Tile Restoration: A Comprehensive Overview
Tile restoration is a process that involves revitalizing old, damaged, or stained tiles and grout to their former glory. It’s a comprehensive service that addresses various issues, from cleaning and sealing to repairing or replacing sections as needed. Understanding what full-service tile restoration entails is crucial for anyone considering this option for their home or commercial space.
The process begins with a thorough inspection to assess the condition of the tiles and grout. This includes identifying any damage, decay, or discolored areas that require attention. How to restore old tile and grout involves using specialized cleaning techniques to remove dirt, stains, and built-up grime. After cleaning, the next step is often sealing or restoring the grout lines, ensuring they are evenly filled and protected against future staining. Depending on the extent of damage, some tiles may need to be replaced, repaired, or reglazed to match the original aesthetic.
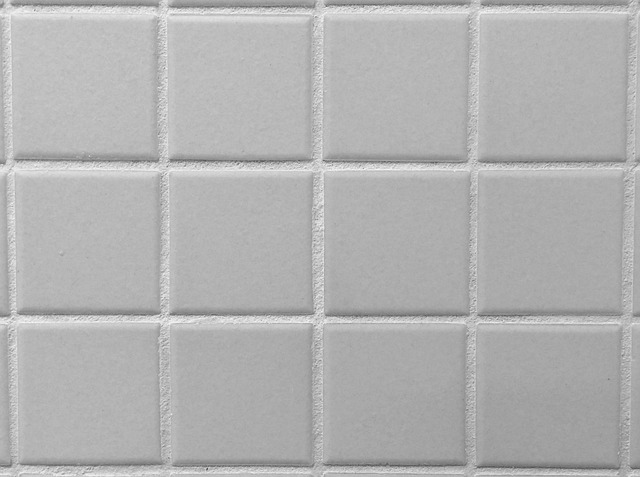
Assessing the Condition of Old Tiles and Grout

When considering how to restore old tile and grout, the first step is a thorough assessment of their current condition. This involves closely examining each tile and grout line for signs of damage, discoloration, or deterioration. Old tiles may have chips, cracks, or peeling surfaces, while grout can become discolored due to dirt, mold, or stains.
This initial evaluation helps determine the extent of the restoration work required. It’s crucial to identify any structural issues with the tiles or underlying substrate before proceeding with any restoration efforts. Proper assessment ensures that the chosen restoration techniques and materials are suitable for the specific needs of the old tile and grout system.
The Cleaning Process: Removing Stains and Dirt

Restoring old tile and grout involves a meticulous cleaning process to remove deep-seated stains and dirt. The first step is to thoroughly vacuum or brush away any loose debris, dust, and grime from the tile’s surface. This initial preparation is crucial for effective cleaning and ensures that only the targeted areas are treated, avoiding unnecessary damage or erosion.
Once the surface is cleared, a specialized cleaner is applied to tackle stubborn stains. These cleaners often contain powerful yet safe chemicals designed to break down and remove dirt, oil, and other contaminants embedded in the tile and grout lines. The cleaning solution is left to saturate for a set period, allowing it to penetrate and loosen any accumulated grime. This step is a game-changer when it comes to How to Restore Old Tile and Grout, as it forms the foundation for the restoration process.
Repairing Damaged Tiles and Mortar Joints

Repairing damaged tiles and mortar joints is a crucial step in full-service tile restoration. Over time, tiles can become loose or crack, while mortar joints may erode, leading to unsightly gaps and an overall worn-out appearance. The process of repairing these issues involves carefully removing any loose or damaged materials, cleaning the affected areas, and then regrouting or replacing individual tiles as needed.
Using appropriate tools and techniques, a professional restorer can match the original grout colour and texture, ensuring a seamless finish. How to restore old tile and grout is a skill that combines precision work with an eye for detail. By tackling these repairs, you not only enhance the aesthetic appeal of your tiled surfaces but also extend their lifespan, keeping your spaces looking fresh and vibrant for years to come.
Grout Replacement: Enhancing the Aesthetic and Functional Value

When it comes to tile restoration, grout replacement is a key step in enhancing both the aesthetic and functional value of your space. Over time, grout can become discolored, damaged, or loose, impacting the overall look and feel of tiled surfaces. How to restore old tile and grout involves more than just cleaning; it requires skilled craftsmanship to accurately match new grout with the existing tiles. This meticulous process not only restores the visual appeal but also ensures water tightness, preventing moisture-related issues that can compromise the longevity of your tiles.
By replacing grout, you not only address cosmetic concerns but also improve the functionality of your tiled areas. Properly installed grout fills gaps and cracks, creating a seamless finish that minimizes water penetration. This is especially crucial in high-traffic areas or spaces prone to moisture, such as kitchens and bathrooms, where regular contact with water can accelerate tile damage. A fresh coat of grout adds a layer of protection, ensuring your tiles remain in top condition for years to come.
Sealant Application for Long-Lasting Protection

Tile restoration isn’t just about cleaning; it involves protecting your tiles for longevity. After a thorough cleaning and grout renewal, applying a sealant is a crucial step in how to restore old tile and grout. This protective layer creates a barrier against moisture, dirt, and stains, ensuring your newly revitalized tiles remain in top condition.
Sealants can be either water-based or silane-based, with the latter offering more durable protection. Professional applicators can choose the right sealant based on tile material and the level of traffic the area receives. Once applied, sealants dry quickly, providing a clear, invisible shield that preserves the vibrancy and integrity of your tiles, making them look as good as new for years to come.
Common Mistakes to Avoid During Tile Restoration

When undertaking tile restoration projects, homeowners often make mistakes that can compromise the final results or lead to future issues. One common oversight is trying to restore tiles without proper preparation. It’s crucial to thoroughly clean the existing grout and tiles, removing any dirt, stains, or mold buildup. Using the wrong cleaning agents or tools can damage the surface, making it harder to achieve a seamless finish later on.
Another mistake to avoid is not addressing grout issues promptly. Grout is essential for holding tiles in place and preventing water seepage. If grout is damaged or missing, it should be replaced as part of the restoration process. Neglecting this can result in uneven tile spacing, water damage, and an unappealing overall look. Following best practices and seeking professional guidance when needed will help ensure a successful and long-lasting tile restoration project using How to Restore Old Tile and Grout techniques.
Maintaining Restored Tiles: Tips for Longevity

After successfully restoring your old tiles and grout, maintaining their longevity requires a few simple tips. Regular cleaning is key; use a mild detergent or stone-safe cleaner to prevent damage from harsh chemicals. Avoid using abrasive tools or scrubbers that can scratch the surface. Instead, opt for a soft-bristled brush to remove any dirt or stains.
Moisture control is another vital aspect. Always wipe up spills immediately and ensure proper ventilation in areas with restored tiles. Excessive moisture can lead to grout discolouration and tile damage over time. Regular sealing of the grout every 3-6 months will also protect against stains, ensuring your tiles remain looking their best for years to come, just like how professional How to Restore Old Tile and Grout services would recommend.