
A leaky faucet is more than just an annoying drip; it can lead to significant water waste and higher utility bills. To address this issue, identify the leak by listening for consistent sounds, checking for water spots, and comparing water bills. Understand that successful repair requires locating the source of the leak and choosing the right parts (like replacement washers or cartridges). Before fixing, shut off the water supply, gather tools, and disassemble the faucet to inspect and replace damaged components. Regular maintenance, including replacing O-rings and cartridges, is crucial for preventing leaks in the long term.
Is your faucet dripping? Don’t panic; fixing a leaky faucet is easier than you think. This comprehensive guide takes you through the entire process, from identifying the problem to maintaining your fixed faucet. We’ll walk you through gathering the right tools, shutting off the water supply, disassembling the faucet, locating and replacing damaged parts, testing your repair, and preventing future leaks with handy maintenance tips. Learn how to tackle a leaky faucet fix like a pro!
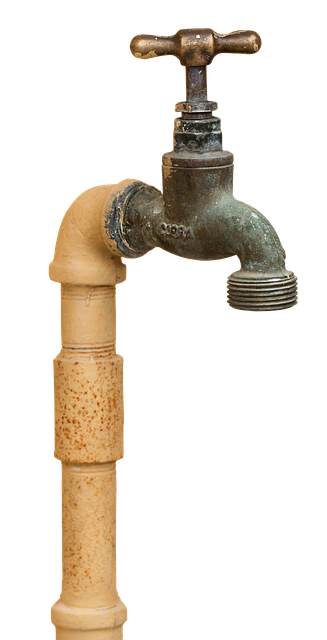
Understanding the Problem: Identifying a Leaky Faucet

A leaky faucet might seem like a minor inconvenience, but it can lead to significant water waste and increased utility bills. Understanding when you have a leaky faucet is the first step in fixing the problem. Look for consistent dripping or splashing sounds coming from your sink, especially after turning off the water supply. Water spots on the counter or floor around the sink, along with higher-than-normal water bills, are also strong indicators of a leaky faucet.
Identifying the source of the leak is crucial for an effective leaky faucet fix. Leaks can originate from various parts: the faucet handle, the washer, or the cartridges inside the faucet. Over time, these components wear out and need replacement. By recognizing the specific area causing the leak, you can choose the right repair method—whether it’s replacing a worn-out washer, tightening loose connections, or swapping out old cartridges.
Gather the Necessary Tools and Materials
Before tackling any leaky faucet fix, it’s crucial to gather the right tools and materials. This typically includes a wrench or pliers for unscrewing parts, Teflon tape or pipe compound for sealing connections, and possibly a new washer or O-ring if the leak is coming from the faucet head or handle. Having these essentials on hand ensures you’re prepared to fix the issue efficiently.
When preparing for your leaky faucet fix, consider the type of faucet you have—kitchen, bathroom, or sink—as this will determine the specific parts needed. Online tutorials can guide you in identifying these components and offer step-by-step instructions tailored to different faucet designs, making the process smoother and less daunting.
Turn Off the Water Supply to Prevent Further Damage
When addressing a leaky faucet, one of the initial and crucial steps is to turn off the water supply to prevent further damage. This simple action can save you from dealing with more extensive and costly repairs down the line. By shutting off the valve under the sink or in your home’s plumbing system, you stop the flow of water, minimizing potential water damage to your countertops, cabinets, and floors.
A leaky faucet often indicates a loose or damaged washer or O-ring inside the faucet mechanism. Turning off the water supply gives you the time needed to inspect and repair these components without the constant rush of water, making the leaky faucet fix more manageable and effective.
Disassemble the Faucet: A Step-by-Step Guide

To tackle a leaky faucet, disassembling it is often the first step in the repair process. This task may seem daunting, but with patience and careful attention to detail, you can quickly resolve the issue. Start by turning off the water supply valves located under the sink. These are usually cylindrical handles or knobs that control the flow of water to the faucet. Once turned off, drain any remaining water from the pipes to avoid splashes and leaks during disassembly. Next, gather your tools: a wrench or pliers for removing components, a bucket for catching excess parts, and perhaps some pipe sealants or new O-rings.
Now, unscrew the faucet handle and remove it completely. This often reveals the faucet’s cartridge or valve seat. Use your tools to carefully take apart these components, being mindful of their placement and order. A leaky faucet could be caused by worn-out O-rings or a damaged cartridge, so inspect these parts for any signs of damage or wear. Disassembling the faucet allows you to identify and replace these parts if necessary, effectively fixing the leaky faucet.
Locating and Replacing the Damaged Parts

Leaky faucets can be a common household issue, but fixing them is often straightforward and can save you money on your water bills. To get started, locate the damaged parts responsible for the leak. Most modern faucets have an easy-to-identify single piece design, making replacement straightforward. Traditional faucets with separate handles and spouts might require more disassembly, but a simple visual check can help identify which components are faulty.
Once you’ve found the problematic areas, such as worn-out O-rings or cartridges, replacing them is a quick process. Many hardware stores carry universal faucet repair kits that include these parts and tools needed for installation. Following manufacturer instructions or online tutorials can guide you through the process, ensuring your leaky faucet fix is done properly and efficiently.
Testing and Troubleshooting: Ensuring a Proper Fix

When troubleshooting a leaky faucet fix, the first step is to test and identify the source of the leak. Start by turning off the water supply valves located under the sink or wherever the faucet is installed. This crucial step will help you prevent unnecessary water waste during your repairs. Once the valves are turned off, remove the faucet handle to inspect the internal components for any obvious damage or debris that might be causing the leak.
After disassembling the faucet, carefully examine the washer, O-ring, and other sealants. These parts are common culprits in leaky faucets. If they appear worn out or damaged, replace them with new ones specifically designed for your faucet model. Testing involves reattaching the handle and turning on the water supply valves. Observe if the leak has been resolved. If not, consider checking for any loose connections or remaining debris that might need further attention. A proper leaky faucet fix requires persistence and meticulousness to ensure a lasting solution.
Maintenance Tips to Prevent Future Leaks
Regular maintenance is key in preventing future leaks from a leaky faucet fix. Start by inspecting your faucets regularly for any signs of damage or wear, such as loose parts or unusual noises. Addressing these issues promptly can stop minor problems from escalating into costly repairs.
Keep an eye on the faucet’s O-rings and cartridges, as these are common sources of leaks. Replace them if they show signs of aging or damage. Additionally, lubricating the faucet’s moving parts with a silicone-based lubricant can help prevent stiffness and reduce the risk of leaks. Always refer to your faucet’s user manual for specific maintenance instructions tailored to its design.