
Leaky faucets, a common household problem, can be easily fixed with basic DIY tools and supplies like plumber's tape, thread sealing tape, new washers, adjustable wrenches, or pliers. First, turn off the water supply and disassemble the faucet to access the faulty washer located at the base. Replace it with a new one, reassemble, and test the repair by turning on the water. Identifying specific leak types—whether from O-rings, cartridges, aerators, or damaged lines—is crucial for tailored solutions. Properly diagnosing and addressing leaks saves costs, prolongs faucet life, and ranges from simple do-it-yourself tasks to complex professional repairs. Gathering the right tools, parts, and knowing your faucet's model aids in successful, long-lasting leaky faucet fixes.
Tired of that nagging drip? Learn how to tackle a leaky faucet with our comprehensive guide, offering both simple and advanced solutions. From identifying common causes like worn-out O-rings to stocking the right tools and parts, we’ve got you covered. We break down fixes for single-handle, two-handle, and stubborn leaks, plus provide preventive measures to keep your faucet leak-free. Discover when it’s best to call a plumber and empower yourself with the knowledge to stop that annoying drip once and for all.
# Leaky Faucet Fix: A Step-by-Step Guide to Stopping That Annoying Drip
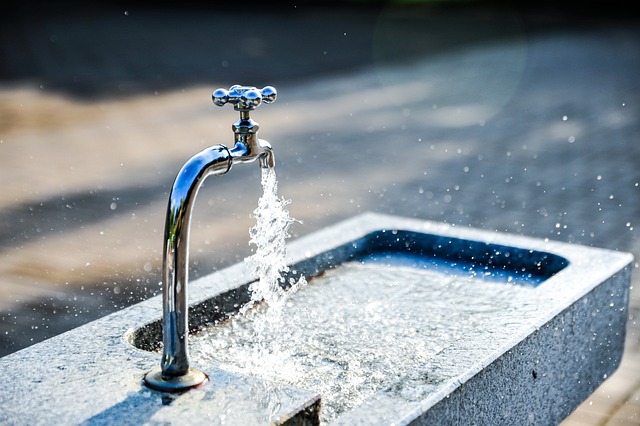
A leaky faucet can be a persistent and frustrating issue, wasting water and potentially leading to higher utility bills. However, fixing it doesn’t have to be a complicated or costly endeavor. With just a few simple tools and some basic knowledge, you can tackle this common household problem head-on. Our step-by-step guide will walk you through the process of identifying and repairing the leak, ensuring your faucet functions smoothly once again without that annoying drip.
Start by gathering your supplies: plumber’s tape, thread sealing tape (PTFE), a new washer, and an adjustable wrench or pliers. Turn off the water supply to your faucet under the sink before beginning. Then, disassemble the faucet according to its design. This typically involves removing the handle and spout, exposing the internal components. Locate the faulty washer, usually near the base of the faucet, and replace it with a new one from your supplies. Reassemble the faucet, ensuring all parts are secure, and test the repair by turning on the water supply.
<section id="understanding-the-common-causes-of-leaky-faucets“>
Understanding the Common Causes of Leaky Faucets

A leaky faucet can be a persistent annoyance, wasting precious water and increasing your utility bills. Understanding the common causes behind this issue is the first step towards an effective leaky faucet fix. One of the most frequent culprits is loose or damaged parts, especially the O-ring or washer within the faucet’s internal mechanism. Over time, these components can degrade, allowing water to seep through and drip continuously. Another prevalent cause is faulty valve seats or cartridges, which control the flow of water in your faucet.
Additionally, mineral buildup or hard water can contribute to leaks by damaging the faucet’s finish and compromising its seals. Corrosion, especially in older fixtures, can also weaken parts and lead to leakage. Addressing these issues promptly not only saves you money but also helps preserve the lifespan of your faucets. A simple DIY leaky faucet fix might involve replacing worn-out O-rings or washers, while more complex problems may require the expertise of a plumber to replace faulty valves or cartridges.
– Identifying the type of leak (dripping, splashing, etc.)
When addressing a leaky faucet, the first step is to identify the specific type of leak you’re dealing with. Is it a steady drip from the spout or a splashing, gurgling sound coming from under the sink? Each type of leak often indicates a different issue and requires a tailored leaky faucet fix. For instance, a consistent drip usually points to an O-ring or washer replacement, while a more erratic splashing might be due to a faulty aerator or even a damaged supply line.
Understanding the source of the leak is crucial for effective and efficient repair. Homeowners can save time and avoid unnecessary parts replacements by accurately diagnosing the problem. Once identified, leaky faucet fixes range from simple do-it-yourself tasks involving common household tools to more complex repairs that may require professional plumbing knowledge.
– Exploring typical culprits like worn-out O-rings or cartridge issues.

Leaky faucets can be a common household nuisance, but identifying and fixing the issue doesn’t have to be painful or costly. The first step in any leaky faucet fix is understanding the basic components of your faucet and what could be causing the problem. Typically, a leaky faucet results from worn-out O-rings or cartridge issues within the faucet’s mechanism. Over time, these parts can degrade due to mineral buildup, corrosion, or simply normal wear and tear.
When an O-ring or cartridge fails, it allows water to escape through the smallest gaps in the faucet’s connections. This may manifest as a slow drip or a more pronounced leak from the base of the faucet handle. Inspecting your faucet for loose parts or visible damage is a good starting point. If you suspect an issue with the O-rings or cartridge, replacing these components with new, compatible parts is usually an effective leaky faucet fix that can save you money in the long run.
<section id="gathering-the-right-tools-and-parts-for-the-job“>
Gathering the Right Tools and Parts for the Job
When tackling a leaky faucet fix, ensuring you have the right tools and parts is key to success. For most standard leaky faucet repairs, a basic toolkit including pliers, adjustable wrenches, and a new washer or O-ring will suffice. Washers and O-rings are commonly the culprit behind leaking faucets, so having replacements on hand is essential. Additionally, knowing your faucet’s specific type and model can help you source the exact parts needed, ensuring a seamless leaky faucet fix.
Before beginning any repairs, take time to gather all necessary components. This includes not only the washer or O-ring but also any other parts that may be affected by the leak, such as valves or cartridges. Properly identifying and addressing these issues will prevent future leaks and ensure your leaky faucet fix is both effective and long-lasting.
– Essential tools needed for repair

When tackling a leaky faucet fix, having the right tools is key to making the process quick and efficient. For most standard faucets, you’ll need just a few basic items: an adjustable wrench or pliers for gripping the faucet handles or base, a slip-joint plier for more stubborn parts, and possibly a new washer or O-ring if your leak is due to a worn-out seal. These tools are readily available at any hardware store and can be easily identified with simple online research on how to fix a leaky faucet.
The goal of the repair is to tighten the connections and replace any damaged parts, which means that precision is important. Start by turning off the water supply valves located under the sink (often controlled by handles or knobs) to prevent any further wastage while you work. Once your tools are ready, carefully disassemble the faucet, taking note of where each part belongs, and inspect for damage. This step-by-step approach ensures that when reassembling, every component is correctly positioned, leading to a seamless leaky faucet fix.