Faucet repair is a manageable DIY task for homeowners with basic tools and knowledge. Start by identifying the problem (low pressure, leaks, temp control) through visual inspection. Gather necessary tools, materials, and replacement parts tailored to your faucet's type and age. Disassemble under-sink components, replace worn parts like O-rings or cartridges, and reassemble carefully. Regular maintenance, including leak checks and aerator cleaning, prevents common issues and prolongs faucet life.
Need to fix that leaky or clogged residential faucet? This comprehensive guide walks you through every step of the process, from identifying common issues to maintaining your fixture for longevity. We equip you with the knowledge to gather the necessary tools and materials, understand your faucet’s type, disassemble, troubleshoot, replace worn-out parts, reassemble, and test for optimal performance. Conquer faucet repair with confidence – no professional needed!
Understanding Common Faucet Issues

Many common faucet issues can be easily resolved with some basic knowledge and tools. Understanding these problems is the first step in effective faucet repair. One of the most frequent issues is low water pressure, which could be caused by mineral buildup in the aerator or a clogged drain. Another typical issue is leaking faucets, often due to worn-out O-rings or washers inside the faucet. Over time, these components can degrade and require replacement. Additionally, temperature control problems, such as hot water not heating up or cold water not mixing properly, may be attributed to faulty valves or thermostats.
Identifying the specific problem is crucial for successful faucet repair. Visual inspection can often reveal obvious signs of damage or wear. Keep an eye out for rust, which indicates moisture intrusion and potential corrosion. If you notice any drips or pools of water around the base, it’s a clear sign of leaks. Addressing these issues promptly not only saves you money on utility bills but also prevents further damage to your faucet and plumbing system.
Gather Necessary Tools and Materials

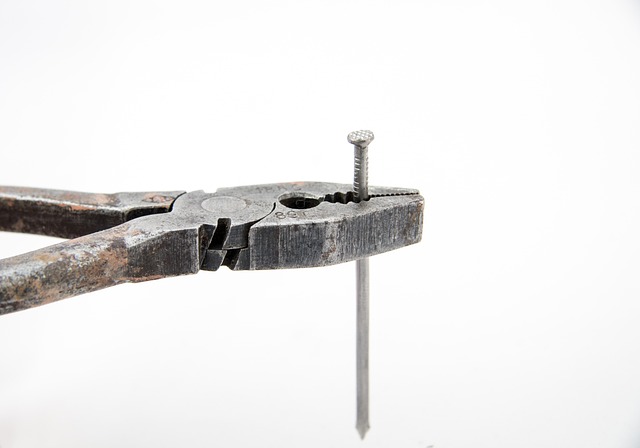
Before beginning any faucet repair, it’s crucial to gather all necessary tools and materials. For most residential faucet repairs, a basic toolkit including pliers, wrenches, screwdrivers, and teflon tape or pipe compound will suffice. These tools are essential for disassembling the faulty faucet and ensuring a secure, leak-free connection upon reassembly.
When it comes to materials, consider the specific parts needing replacement. This could include O-rings, cartridges, or washers. Having these on hand, along with your chosen sealants, will streamline the repair process. Remember, proper preparation is key to a successful faucet repair, minimizing disruption and ensuring long-lasting functionality.
Identifying the Type of Faucet You Have

Identifying the type of faucet you have is a crucial first step in any faucet repair process. Different models and styles, from traditional to contemporary, employ various mechanisms and parts. Familiarize yourself with the components—such as cartridge, compression, or ball valves—to understand how your faucet operates. This knowledge will help you source the right replacement parts and ensure a successful repair.
When assessing your faucet, consider its age, brand, and any unique features. Older faucets might require different repair techniques and spare parts compared to newer models. Additionally, note the water flow rate and temperature control mechanisms for specific adjustments during the repair process. Each type of faucet presents a unique challenge, but with the right understanding, you’ll be well-equipped to tackle common faucet repair issues.
Disassembling the Faucet for Repair

When it comes to faucet repair, disassembling the faulty components is often the first step towards a successful fix. This process allows you to inspect each part for damage or wear and identify the root cause of the leak or malfunction. Start by turning off the water supply valves located under the sink; this ensures a safe and dry work area. Then, with the right tools at hand—typically including a wrench or pliers—begin to carefully remove the faucet handle and spout.
The disassembly process varies depending on the faucet’s design, but most will have a few key parts: the valve body, cartridge (or washer), O-rings, and seals. Each component plays a crucial role in the faucet’s functionality, so handling them with care is essential. Once removed, examine each part for damage or debris, replace any worn-out components, and ensure all parts are properly aligned before reassembling—a meticulous approach to faucet repair will ensure long-lasting performance.
Troubleshooting Leaks and Clogs

When it comes to faucet repair, troubleshooting leaks and clogs is a common issue homeowners face. Start by identifying the source of the problem—is water dripping from the base or spout? A leak at the base often indicates a worn-out washer or O-ring, easily replaced parts that can stop the leak promptly. For clogs, try using a plunger to clear the drain. This simple tool can dislodge hair and other debris buildup that might be causing the blockage.
If these initial attempts don’t resolve the issue, it may be time to inspect the aerator or strainer. These components can gather mineral deposits and food particles over time, leading to both flow restrictions and leaks. Regularly cleaning or replacing them is an effective faucet repair solution, ensuring your fixture functions optimally once again.
Replacing Worn-Out Parts

When tackling a residential faucet repair, one of the most common issues is worn-out parts. Over time, components like O-rings, cartridges, and valve seats can degrade or become damaged, leading to leaks and reduced water flow. Identifying these parts and replacing them is often a straightforward process for homeowners. Many faucets have accessible, replaceable parts that can be bought at local hardware stores.
Before purchasing new parts, it’s crucial to identify the specific model of your faucet. This ensures you get the right fit and functions seamlessly. Most faucet repair kits come with detailed instructions, making the replacement process manageable for even novice DIY enthusiasts. Regular maintenance and timely replacement of worn-out components can significantly extend the life of your faucet, saving you from more complex repairs in the future.
Reassembling and Testing the Faucet

After disassembling the faucet, carefully inspect all components for damage or wear. Replace any faulty parts as needed before reassembling. Ensure that each piece is secured properly and in the correct order. Tighten connections firmly but avoid overt tightening to prevent stripping or damage.
Once reassembled, test the faucet thoroughly. Turn on the water supply and observe if there are any leaks at the base, handle, or spout. Check for proper water pressure and temperature control. A steady flow without drips confirms successful repair. If issues persist, double-check connections and consider consulting a professional for complex faucet repair needs.
Maintenance Tips for Longevity

Regular maintenance is key to ensuring your residential faucet repair needs are minimal and the life of your faucets is extended. Start by checking for any leaks around the base and handles regularly, as even small drips can add up to significant water waste over time. Keep an eye on the faucet’s aerator too; it can become clogged with mineral deposits, reducing water flow and pressure. Cleaning or replacing the aerator can easily be done and is a simple step to prevent clogs and maintain optimal performance.
Additionally, lubricating the faucet’s moving parts, such as the cartridge or valve seats, can prevent stiffening and damage. This can be done with a specialized lubricant designed for plumbing fixtures. Remember, routine care and attention will save you time, money, and potential headaches in the long run when it comes to frequent faucet repairs.
