
Stem wall damage, often overlooked but critical, can compromise a building's structural integrity. This guide offers a comprehensive stem wall repair process, emphasizing early identification and meticulous assessment. Key steps include using high-quality materials, cleaning the area, applying joint compound, sealing, waterproofing, and regular maintenance checks to prevent future issues. Proper preparation, choosing suitable materials, and avoiding common mistakes ensure durable repairs that enhance aesthetics while maintaining structural soundness. Regular inspections are vital for long-term stem wall integrity and building stability.
Cracked walls, especially in older structures, often signal stem wall damage—a critical issue requiring prompt attention. This comprehensive guide delves into the intricacies of stem wall repair, addressing common causes like settlement, shifting soil, and water intrusion. We’ll walk you through assessment, choosing the right materials, step-by-step repairs, best practices, and avoiding pitfalls. From enhancing aesthetics to ensuring structural integrity, learn expert tips for effective stem wall restoration.
Understanding Stem Wall Damage: Causes and Types

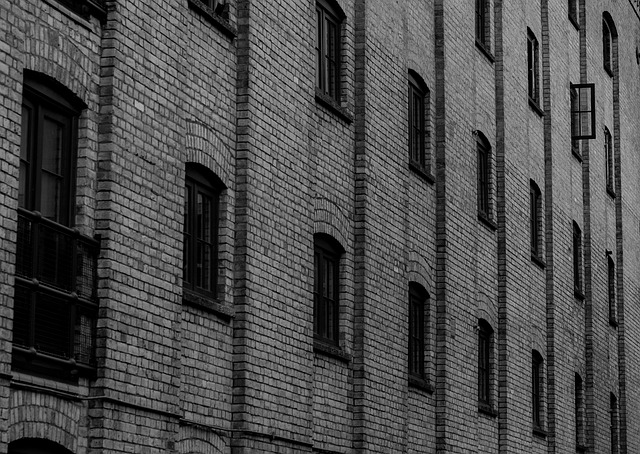
Stem wall damage, often overlooked, is a common issue in older buildings or those with poor maintenance. Understanding the causes and types of stem wall damage is crucial for effective stem wall repair. This type of damage refers to the deterioration or cracking of the vertical supports, typically made of brick, stone, or concrete, that form the structure’s backbone.
Causes range from settlement and shifting of the building’s foundation due to changes in soil conditions, to excessive moisture intrusion leading to erosion and structural weakness. Types of stem wall damage include hairline cracks, which are superficial but indicative of underlying problems, and larger, more extensive cracks that can compromise the wall’s integrity. Identifying these issues early is key to preventing further deterioration and ensuring the longevity of the building through prompt stem wall repair.
Assessment and Inspection: Identifying Repair Needs

When considering cracked wall restoration, the first step is a thorough assessment and inspection. This involves closely examining the walls to identify the extent of damage and determine repair needs. Cracked walls can result from various issues like structural problems, settlement, moisture intrusion, or even normal wear and tear. During the assessment, professionals look for cracks’ depth, width, pattern, and location—cracks in stem walls, for instance, require specialized attention due to their structural significance.
Inspecting the surrounding area is also crucial. This includes checking for uneven floors, ceiling cracks, or doors that stick, as these could indicate underlying issues that need addressing alongside stem wall repair. Visual inspection alone might not suffice; sometimes, non-invasive testing methods like moisture meters or radar scanning are employed to pinpoint problem areas and guide the restoration process effectively.
Materials and Tools for Effective Stem Wall Repair

When it comes to stem wall repair, choosing the right materials and tools is paramount for achieving a robust and lasting fix. Start with high-quality mortar, preferably one designed specifically for outdoor applications and able to withstand varying weather conditions. A mix of Portland cement, sand, and water will create a strong bonding agent that can fill cracks and gaps effectively. For intricate repairs or larger damage, consider adding fiber reinforcement to your mortar blend; this will enhance structural integrity and prevent future cracks from forming.
Complementing your mortar selection, you’ll need suitable tools for accurate application. A trowel with a flat edge is essential for spreading the mortar evenly into the cracks. A grout bag or putty knife can be used for precise filling of tight spaces. For larger openings, a hammer and chisel may be needed to carefully remove loose material before applying the fresh mortar.
Step-by-Step Guide to Fixing Cracked Walls

Fixing cracked walls is an essential part of maintaining and restoring any building’s interior. Here’s a step-by-step guide to help you with stem wall repair, ensuring your cracks are not only filled but also prevented from reappearing.
1. Inspect and Assess: Start by thoroughly inspecting the damaged area. Identify the type and severity of the crack. For stem walls, assess if the crack is structural or merely cosmetic. This step is crucial as it determines the extent of repair needed.
2. Prepare the Area: Once you’ve identified the crack, clean the surrounding area to remove any debris, dust, or loose material. Use a wire brush or vacuum to ensure a clean surface. This preparation is vital for the longevity of your repair work.
3. Mix Repair Compound: Prepare a mixture of joint compound or spackling compound tailored for stem wall repair. Follow the manufacturer’s instructions for the correct ratio of water to compound. A smooth, consistent texture is key.
4. Fill the Crack: Apply the mixed compound directly into the crack using a putty knife. Ensure you fill the entire length and depth of the crack. Work in thin layers, allowing each coat to dry before adding another. This method prevents cracks from reappearing by providing a strong bond.
5. Sand and Smooth: Once the final layer is dry, sand the repaired area gently with fine-grit sandpaper until it’s smooth and even with the surrounding wall surface. Remove any excess compound with a clean cloth or paper towel.
6. Prime and Paint: Apply a primer to the repaired area to ensure better paint adhesion. After drying, paint over the repair match the existing wall color. This step blends the repair seamlessly into the rest of the wall.
Best Practices for Long-Lasting Restoration Results

When undertaking cracked wall restoration, especially for stem wall repair, it’s crucial to follow best practices for long-lasting results. This involves a multi-step process starting with thorough cleaning to remove any debris or old mortar. The use of appropriate tools and techniques during this phase is key to ensuring the integrity of the existing wall structure.
Subsequent steps include assessing the extent of damage, which might necessitate the use of specialized products for repairs. Proper sealing and waterproofing are also essential to prevent future cracks from forming or existing ones from widening due to moisture intrusion. Regular maintenance checks post-restoration can help catch any emerging issues early, ensuring longevity of the repair job.
Common Mistakes to Avoid During the Repair Process
When restoring cracked walls, especially stem wall repair, it’s crucial to avoid common mistakes that can compromise the integrity of the structure and lead to future damage. One frequent blunder is inadequate preparation of the damaged area. Skipping this step results in a subpar fix as it fails to address the root cause of the crack. Proper preparation involves cleaning the area, removing loose debris, and ensuring the wall surface is dry and smooth. Neglecting this can lead to weak adhesion of repair materials.
Another mistake is using the wrong materials or techniques for the specific type of damage. Different cracks require distinct approaches. For instance, hairline cracks might only need mortar or polymer-based fillers, while larger gaps may necessitate more robust solutions like steel ties or mesh reinforcement. Misjudging the severity of the damage and choosing unsuitable repairs can result in unsightly patches that stand out against the rest of the wall, compromising both aesthetics and structural soundness.
Enhancing Aesthetics: Color and Texture Matching

Cracked walls, while functional, can detract from a space’s overall aesthetics. One aspect of stem wall repair that often receives less attention is enhancing visual appeal through color and texture matching. When restoring a crack, it’s not just about repairing the structural damage; it’s also about preserving or improving the wall’s artistic contribution to the room.
Proper color matching ensures the repaired area blends seamlessly with surrounding walls, preventing an obvious patch from drawing unwanted attention. Similarly, texture matching is crucial for maintaining visual harmony. Whether the original wall had a rough, textured finish or a smooth, painted surface, mimicking this texture during the repair process helps create a unified look that complements the space’s overall design.
Ensuring Structural Integrity After Repairs

After a successful cracked wall restoration, ensuring the structural integrity of the stem wall is paramount. This involves careful inspection and reinforcement to prevent future damage. A qualified professional will assess the extent of the cracks and determine if any additional support is needed. Techniques like carbon fiber wrapping or steel bracing can be employed to fortify the wall, enhancing its load-bearing capacity and ensuring it can withstand environmental stresses.
Regular maintenance checks are crucial in the aftermath of repairs. Monitoring for new cracks, water seepage, or signs of shifting helps catch potential issues early. Prompt action on these alerts can avert more significant structural problems down the line. Proper restoration not only revitalizes the aesthetic appeal of a space but also strengthens the underlying structure, providing long-lasting peace of mind.
Maintenance Tips for Future Stem Wall Durability
Regular maintenance is key to ensuring the longevity and durability of stem wall repair. Here are some essential tips to keep your stem walls in top condition:
Inspecting your stem walls periodically is crucial. Look for any signs of damage, cracks, or moisture seepage. Early detection allows for prompt action, preventing minor issues from turning into major repairs. Schedule annual or bi-annual inspections, especially in areas prone to extreme weather conditions. During these checks, ensure all joints and connections are secure and sealed properly to prevent water intrusion.